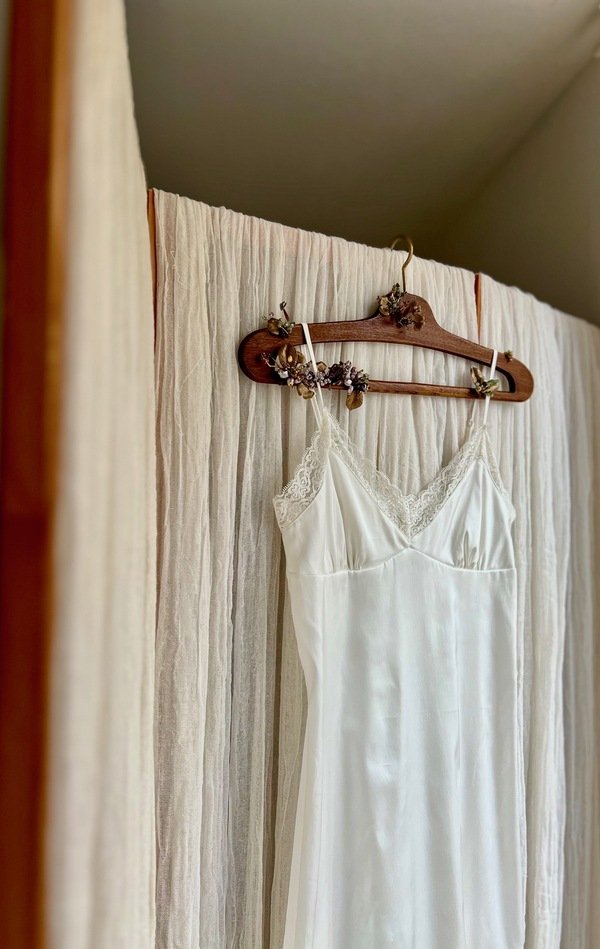
Jewellery-Inspired Wedding Hanger: A Personal DIY Project
As someone who used to make jewellery, I’ve always enjoyed working with beads, wires, and creating something unique. Recently, a wedding in my family inspired me to get creative again, but this time with a twist. I decided to make a jewellery-inspired wedding hanger—perfect for hanging a bridal dress in style. If you have some beads, jewellery wire, and a rotary tool, you can easily create a beautiful, personalized hanger with a touch of elegance.
Why I Chose a Forest-Inspired Colour Palette
For this project, I decided to go with a rustic, woodland theme, incorporating earthy gold tones, greens, and purples. These colours bring a natural, forest-like charm to the hanger, making it a perfect fit for a rustic or bohemian wedding. I wanted the design to feel organic, like a piece of jewellery, while still being practical for everyday use (or at least for a special occasion like a wedding!).
Key Tips for Making a Jewellery-Inspired Hanger
While creating this hanger, I learned a few valuable lessons that I’d love to share with anyone attempting a similar DIY project.
Balance is Key
If you’re planning to use heavier beads or metal elements and prefer an asymmetrical design, make sure to check the balance of the hanger. Adding too many decorations on one side can cause the hanger to tip, which isn’t ideal when you’re using it to display a wedding dress. A well-balanced hanger will not only look better but will also function properly without tilting.
2. Use a Proper Rotary Tool for Drilling
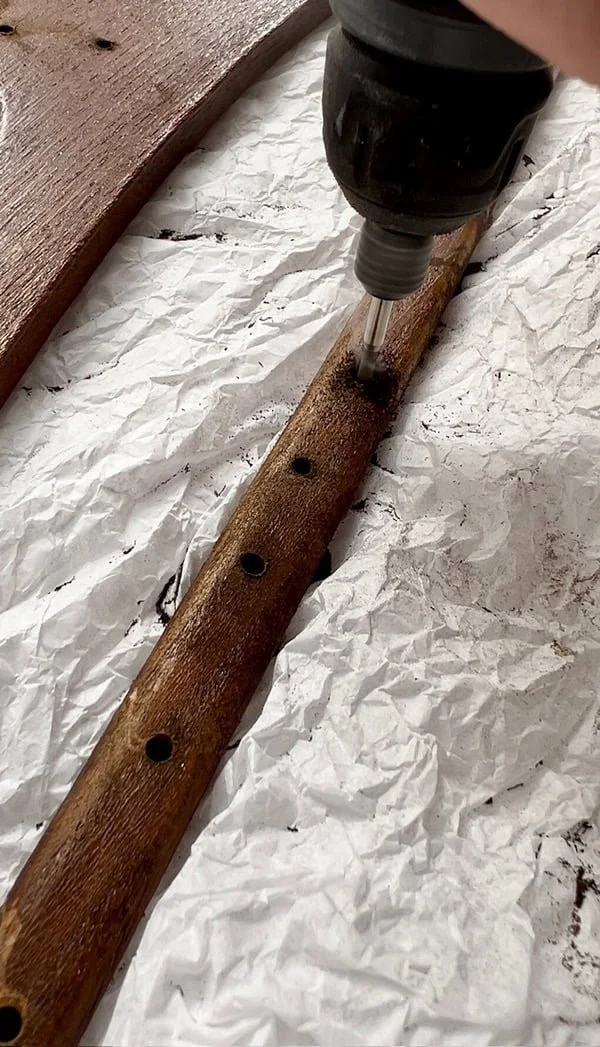
In my initial attempt, I tried to drill holes using an electric nail file with a small drill bit attachment. Unfortunately, this didn’t work on my wooden hanger. So, I highly recommend using a mini rotary tool (like a Dremel), which is more powerful and precise for this type of project. It will save you time and frustration!
3. Consider the Type of Garment
This particular hanger is best suited for dresses with straps. The beaded embellishments could potentially catch on or scratch more delicate fabrics if used with other types of garments. Keep this in mind when deciding how to use your jewellery-inspired hanger.
The Simplicity of the Project
Even though the end result looks intricate, this project is actually quite simple once you have your design planned out. If you’re organized and know what look you’re going for, you can easily complete the hanger in a few hours. Don’t be afraid to experiment with different colour palettes or styles. You could use just pearls for a more classic look or stick to one colour for a modern, monochrome feel.
If you want to add an extra personal touch, you can engrave or attach the bride’s name or the wedding date on the hanger. It’s a wonderful way to turn a simple hanger into a meaningful keepsake that can be cherished for years.
What You’ll Need:
1. Hanger
The best option is a wooden hanger, as it adds a natural charm, perfect for a boho or rustic style. If you prefer a more "princess" look, you could use a plastic hanger. I haven’t tried it myself, but it should work fine since you can make small holes by heating up a nail to melt through the plastic.
2. Mini Rotary Tool
This will help you drill holes in the wood hanger. It’s essential for creating the small openings needed to thread your wire and beads through.
3. Jewellery Wire
Available in various colours depending on the style you’re going for. You can choose white, silver, or brown to mimic tiny branches or suit your overall design.
4. Beads
Here’s where you can get creative! There’s a wide range of beads available, but I encourage you to think about recycling old jewellery. You can hunt for vintage beads from your grandmother’s collection or at flea markets—perfect for creating something unique and affordable.
5. Scissors
To cut the wire and trim any excess threads.
6. Marker/Pen
You’ll need this to mark where you want to drill the holes on your hanger, making the design process easier.
Step 1: Planning the Placement of Your Decorations
We begin by roughly determining where we want our embellishments to be placed on the hanger. I used a marker to dot a few key points where I plan to attach beads and other elements. This step helps create a clear vision of your final design and ensures that everything will be balanced and evenly spaced. It's also useful for making sure you leave enough room for the hanger to function properly—especially if it's meant for hanging a special dress, like a wedding gown.
Step 2: Drilling the Holes
Next, it's time to drill holes through the marked spots. Using a mini rotary tool, carefully drill all the way through the hanger at each marked point. These through-holes will allow you to thread the jewellery wire from one side of the hanger to the other, securing your beads and decorations in place. Make sure the holes are evenly spaced to maintain balance and ensure that the wire can be pulled tightly through without breaking.
Step 3: Threading the Wire and Adding Decorations
In this step, cut a longer piece of jewellery wire and thread it through one of the holes you’ve drilled. If necessary, secure the wire at the back of the hanger by "anchoring" it with a bead to prevent it from slipping through. Once the wire is in place, you can start adding your decorations—beads, metal elements, or any other embellishments you’ve chosen. Continue to thread the wire through the holes, placing your beads or elements as you go. This will allow you to create a beautiful, layered design that wraps around the hanger.


