DIY: Concrete-Look Doorstop Made from Paper Pulp and a Plastic Bottle

Hey, DIY enthusiasts!
Are you tired of boring doorstops? Here's a recipe for a unique, practical, and stylish addition to your home – a handmade doorstop that looks like real concrete but is actually made from papier-mâché pulp and an old plastic bottle. It's something that will not only keep your doors in place but also add a bit of edge to your interior!
What You’ll Need
Start by gathering old newspapers and plastic bottles – time to work some recycling magic! To give your doorstop the right weight, fill it with stones. And if you want it to be not only practical but also stylish, make yourself a handle from a piece of old fabric wrapped in twine. The result? Combining functionality with a touch of elegance!
The Design and Inspiration:
Your doorstop will have a long, dome-like shape with a handle for easy carrying. To add a pinch of charm, add a little phrase: "Stop! In the name of love", cut out from compressed papier-mâché pulp. Those concrete-like letters are the details that give your project character!
Versatility in Home Decor
Your doorstop doesn't have to be dull! With its concrete-like appearance, it will blend perfectly in both industrial and cozy interiors. It's also a thoughtful gift for your loved ones that they're sure to appreciate.
Get Inspired
And this idea of cutting letters out of papier-mâché pulp can be handy not only for doorstops! Imagine personalized posters, wall art, or other decorative accessories. Only your imagination can set the limits here!
Let's Dive In!
Crafting your own doorstop is a delightful journey that allows you to unleash your creativity while also making an eco-friendly choice. Whether you decide to keep it for yourself or share it with someone special, it's sure to make a statement! Stay tuned for a step-by-step guide on creating your very own concrete-style doorstop, packed with tips for a successful project!
Step-by-Step Guide
(Coming next: A detailed, step-by-step guide to making your paper pulp and plastic bottle doorstop, including materials, preparation, and assembly instructions.)
Link to paper pulp recipe:

Below are the materials I used in this project. Of course, you can substitute them with whatever suits you best. For example, a metal rod can be replaced with a long nail. It all depends on what you have available.
Paper Pulp
Plastic Bottle
Sharp Knife
Cling Film
Newspaper
Rubber Bands
Smoothing Knife
Bottle Cap
Sandpaper
Pliers
Rolling Pin
Transparent Film can be Document Sleeve
Printout
Scissors
Ballpoint Pen
Paintbrush
Paint
PVA Glue
Toothpick
Tweezers
Piece of Fabric
String
Metal Rod
Wire
Tall Container
Stones
We start by cutting off the top part of the bottle. We will be creating the shape of a dome using the bottle.

We wrap the top of the bottle with cling film.

We wrap the whole thing in newspaper and secure it with elastic bands.


Then we begin applying the paper pulp. Don't apply it to the entire surface as it will definitely fall off. Divide the process into 2/3 steps. Wait until the first layer dries a bit, then apply the next one. This is a process for the patient ones :-)

Smooth the surface with a knife.

Cut off the top part of the newspaper and place the bottle cap in the middle. This way, you'll get a nice opening through which you'll thread the handle in the later stage.
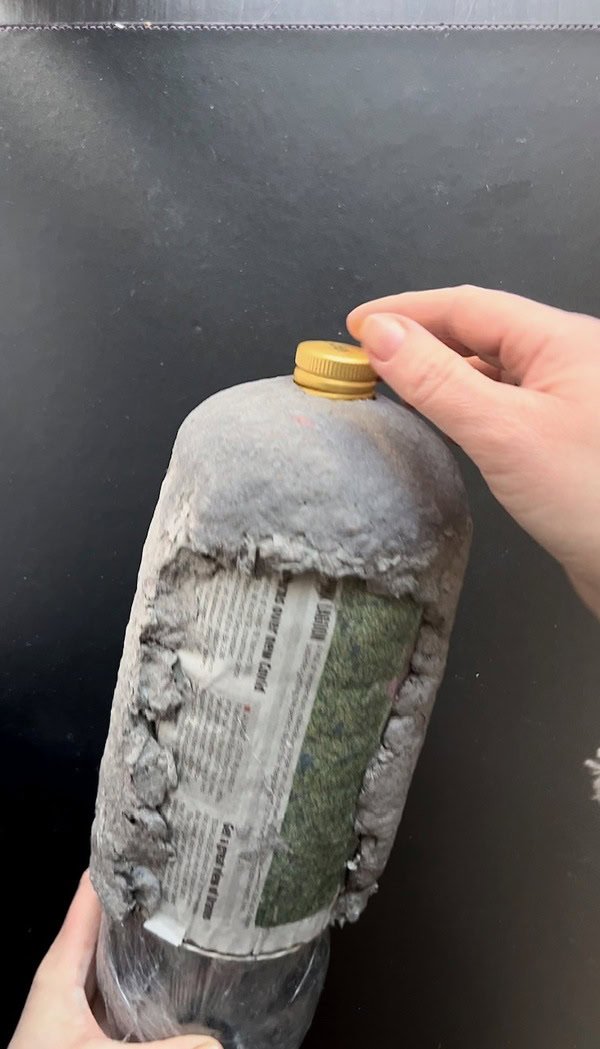
Once the first layer has dried, you can apply the next one.

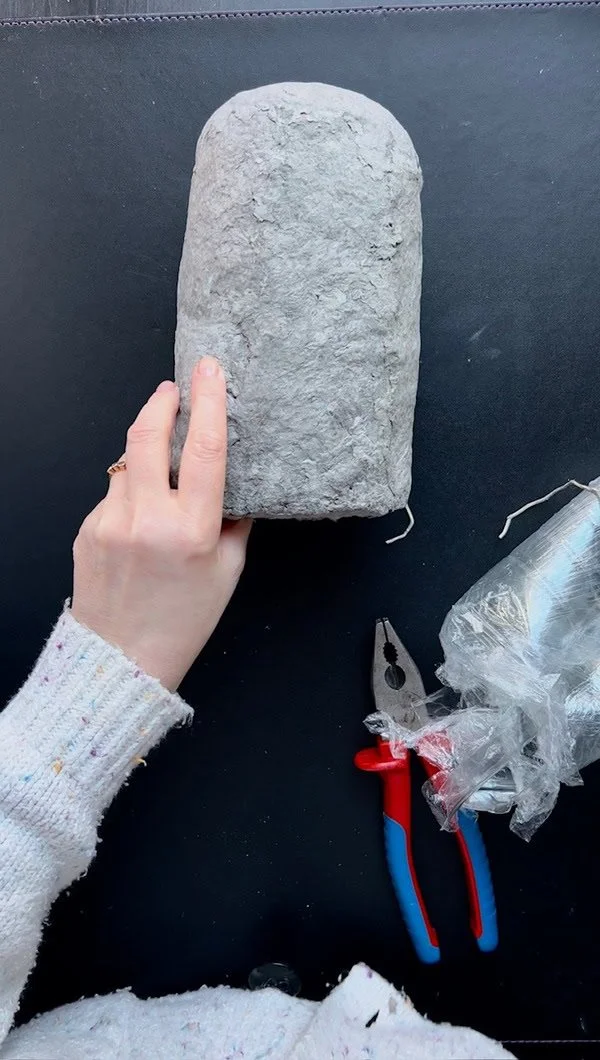
Once everything is dry, you can remove the bottle. You can cut it to make it easier to remove.
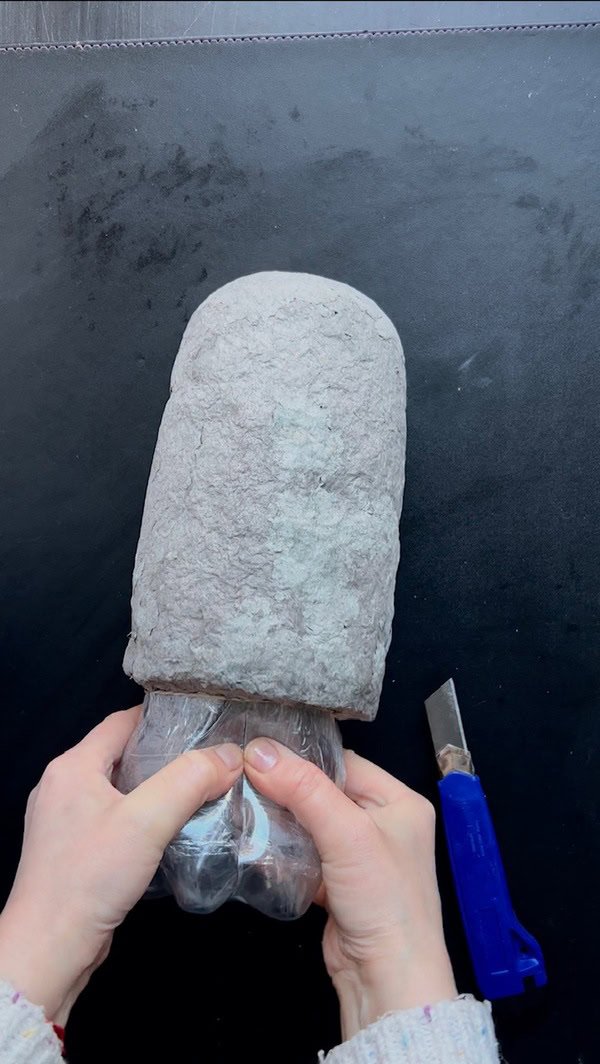
At this stage, you can sand the surface of the dome or leave it if you're satisfied with the effect.
The next step is to make the letters. We start by rolling out the paper pulp.
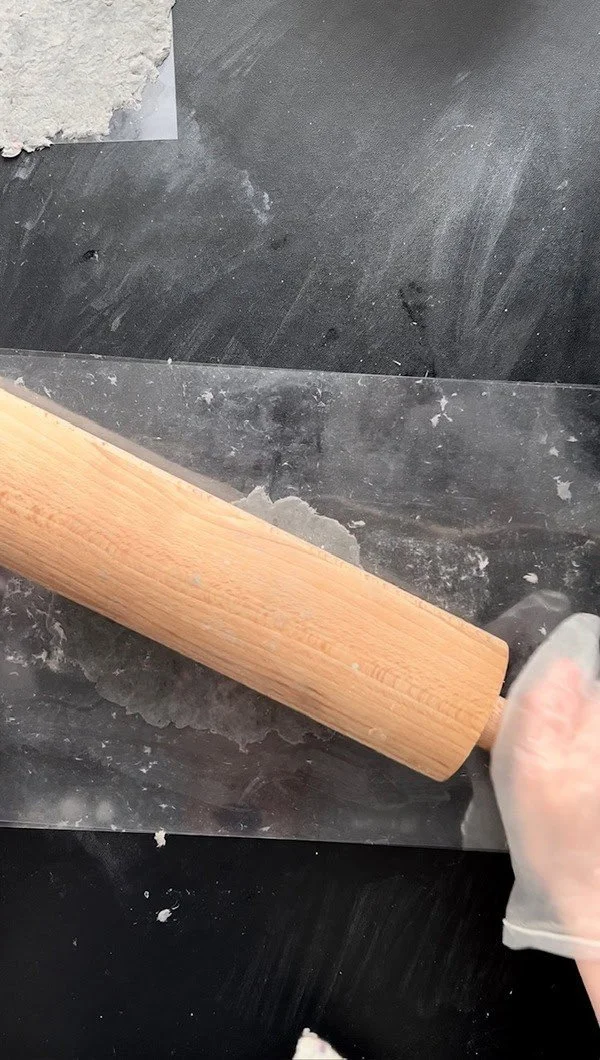
I gave my sheet of compressed paper pulp a rough finish. I used a knife to create an uneven surface.
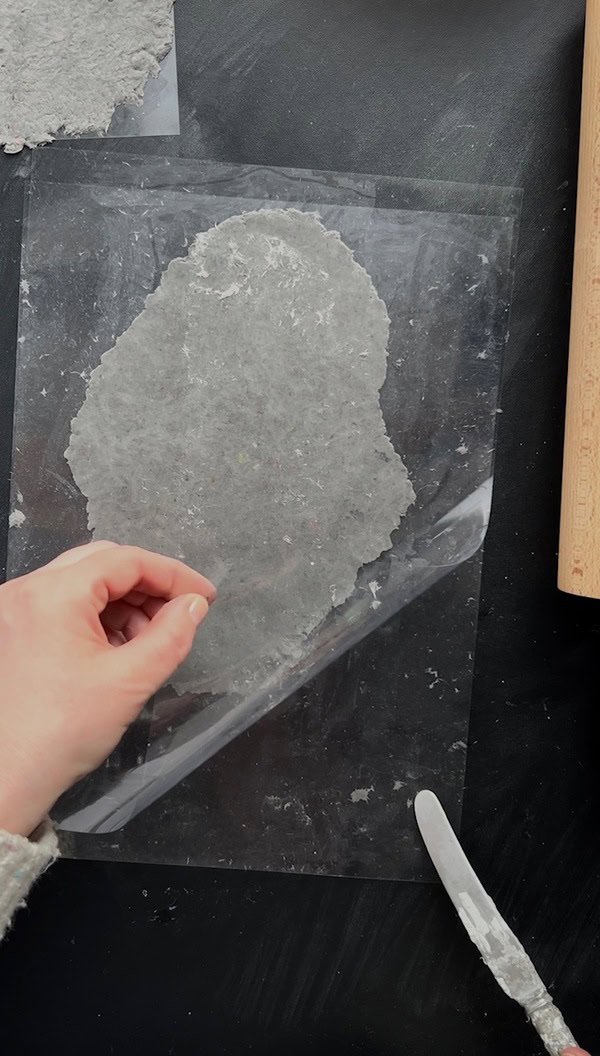
I left it to dry completely.

This is the bottom side.

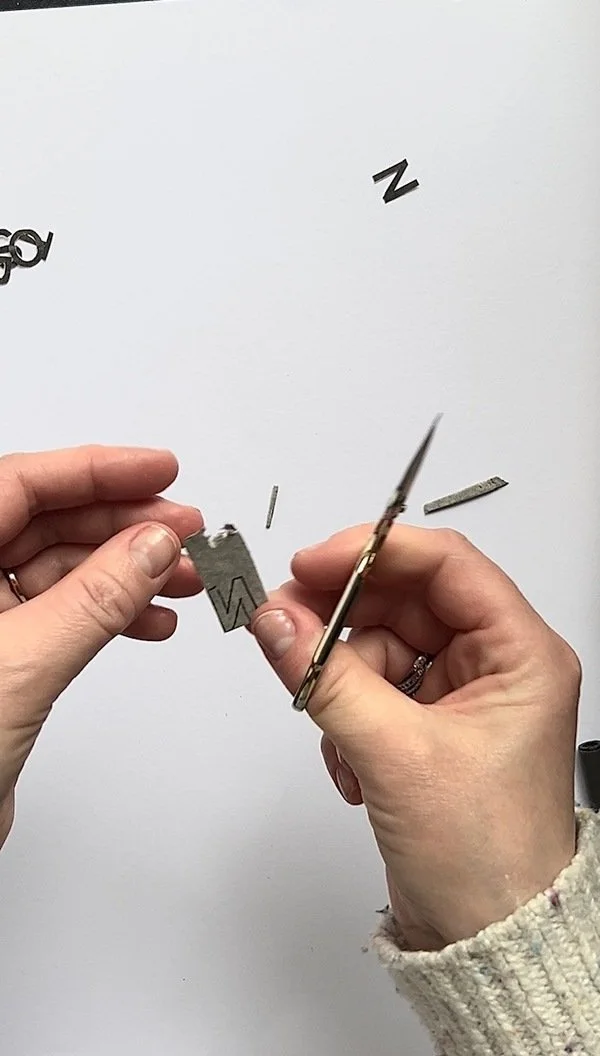
The next step is to carefully cut out all the letters and trace them onto the bottom side of our paper sheet.


We cut out the letters delicately.
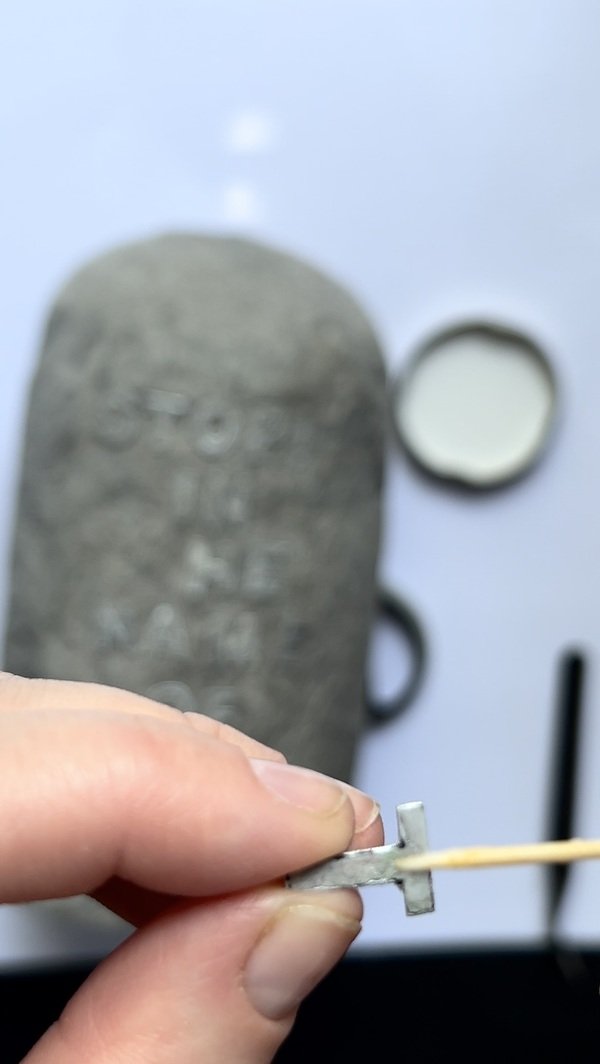
The next step is to paint the edges of the letters with silver paint.


Then we arrange all the letters on the dome. We need to determine the position of each letter.

On each letter, we apply PVA glue using a toothpick.

To ensure that the letters are securely attached, we wrap them with, for example, wide tape for a certain period of time.

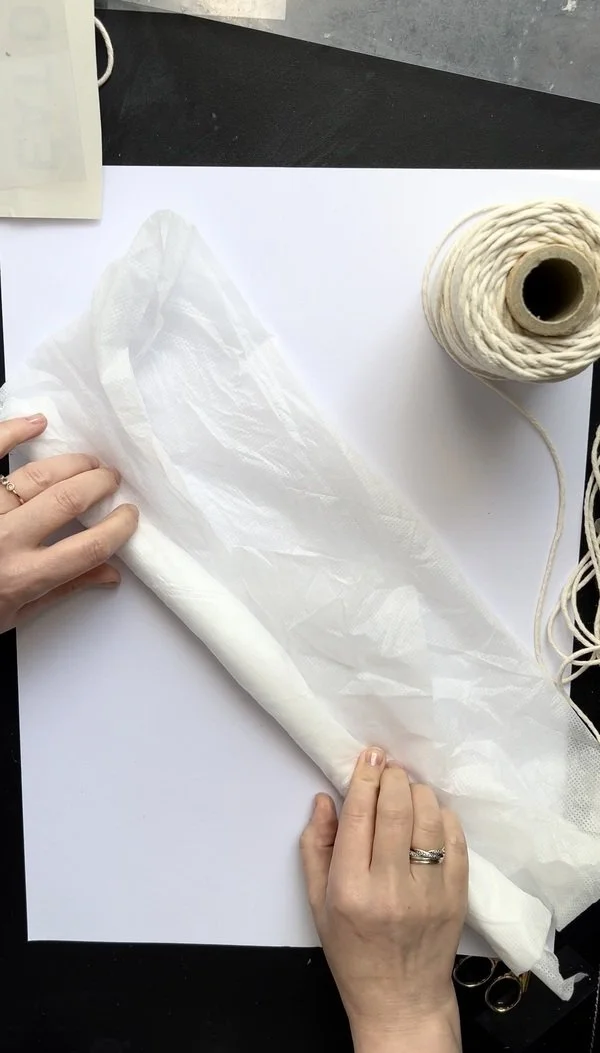
The next step is to create the handle and attach it. For this purpose, I used a piece of old fabric, which I rolled up and then wrapped with string.

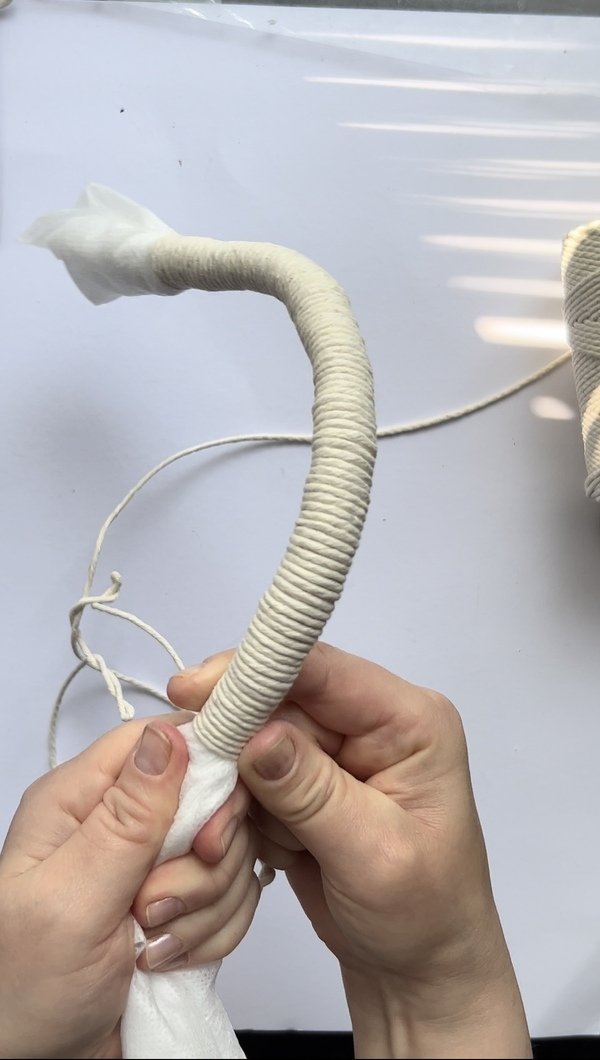
To mount the handle in the dome, I used a piece of metal rod (a metal skewer for grilling) and wire. I wrapped the ends of the fabric around the rod - this way they will secure the handle.


In the next step, I threaded the handle through the opening.


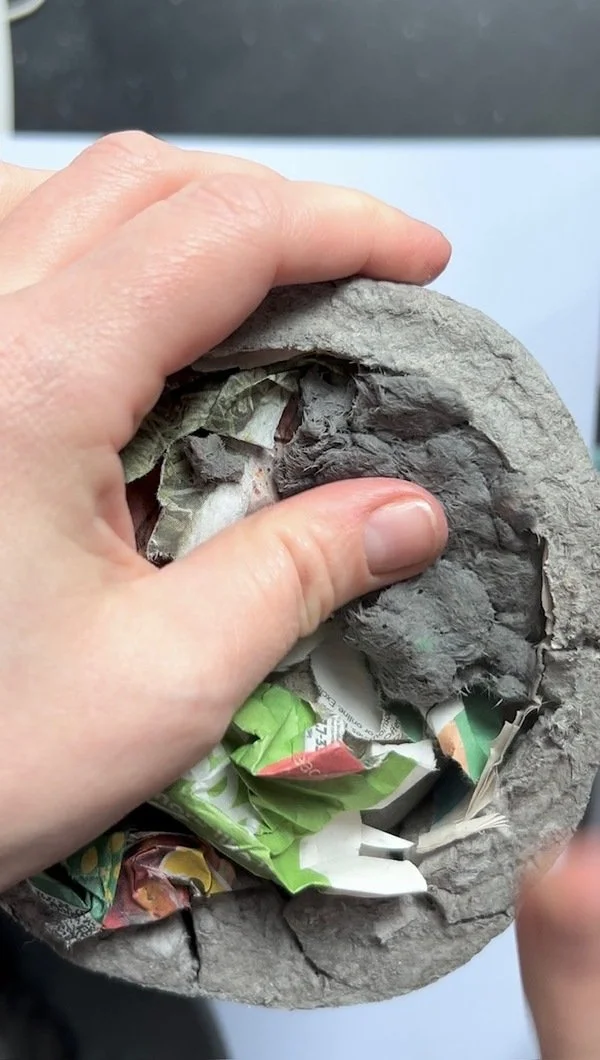
In the next step, we need to place our bumper on a tall box (I used a plastic pot). The idea is that the bottom should be facing upwards so that the lower layer of paper mass can dry freely and the stones do not press on it.

We place stones (or something else that can weigh down the doorstep - e.g., sand - but remember to put it in a bag to prevent it from spilling through the top opening) and newspapers. Then, we apply a layer of paper pulp and smooth it out. And voilà, our doorstop is ready. Of course, the bottom layer needs to dry.