DIY: Creating a Sculpture Stand Using Paper Pulp and a Latex Glove

Transforming Everyday Materials into Art: My Minimalist Hand Sculpture
Hi everyone! Welcome back to my DIY corner, where creativity meets practicality. Today, I want to share a project that holds a special place in my heart—a minimalist sculpture or stand crafted from paper pulp, using a latex glove as the mold. This elegant creation, resembling an upward-reaching hand with a forearm, adds a touch of industrial chic to any space. I think it would make a fantastic gift, especially for anyone who appreciates unique, handmade decor.
Materials and preparation
To start, I gathered a few essential materials: paper pulp, a latex glove, water, gray, black, and silver paint, a mixing bowl, and a brush. The key to obtaining a complex hand shape is the elasticity of the paper pulp and the adaptable nature of the latex glove. I started by soaking the paper in water until it became soft and pliable. Then, I blended the soaked paper until smooth, ensuring the mixture wasn't too watery by draining off any excess water.
Crafting the Sculpture
The next step was where the magic happened. Carefully, I filled the latex glove with the prepared paper pulp, making sure to work the pulp into the fingers and thumb to achieve the desired hand shape. This part was a bit tricky, but also very satisfying. I adjusted the pulp-filled glove to ensure it held the correct form, as this step is crucial for defining the intricate details of the hand. Then, I allowed the glove to dry completely, which took a few days depending on the humidity and temperature.
Once the paper pulp was thoroughly dry, I carefully cut and peeled away the latex glove. This revealed a beautifully formed hand sculpture, ready for the next steps.
Adding finishing touches
Wanting to maintain a minimalist aesthetic, I chose subdued colors. I added accents of black and silver paint because these muted tones easily complement modern interiors, adding a touch of sophistication without overwhelming the space. This step allowed me to customize the sculpture to fit seamlessly into my own bright, airy home decor.
Displaying your graphics
This minimalist hand sculpture can enhance various spaces in your home. I placed it on a shelf in the living room to create an eye-catching centerpiece. It can also be used as a stylish stand for small items such as jewelry or keys. Additionally, it adds a touch of industrial elegance to a bedside table or a chest of drawers in the bedroom. The versatility of this piece makes it a wonderful addition to any room.
Celebrating Creativity
This DIY project highlights how simple, everyday materials can be turned into something special. By using creativity and a bit of resourcefulness, I transformed ordinary paper pulp and a latex glove into a unique piece of art. Whether you're a seasoned DIY enthusiast or just starting out, this minimalist sculpture is a fun and fulfilling project. It’s also a fantastic gift idea for friends and family who appreciate handmade decor.
Take on the challenge and enjoy making your own unique piece. It’s a great way to express your creativity and add a personal touch to your home decor. Plus, it’s always rewarding to see something you’ve made with your own hands enhancing your living space.
Happy crafting!
You will need:
Paper pulp
Latex glove
Pencil
Pins
Styrofoam or cardboard
Scissors
Piece of paper
Plastic wrap
Wooden skewers for grilling (optional)
Paper towel tube
Stones, sand, etc.
Sandpaper
Paint and brush (optional)
Below you will find the recipe for paper pulp.

We begin the process by preparing paper pulp, which we fill into a glove. The pulp inside the glove should be very compact, so we press it forcefully and shape it.

At this stage, a pencil or another object with a thick, flat tip can be helpful.
Each filled finger can be evenly rolled, thereby giving them shapes.


To maintain the desired shape, the fingers can be secured with sewing pins and a piece of styrofoam or cardboard. We place the glove on the styrofoam and arrange each finger in the desired position, then lock the fingers in place using pins.

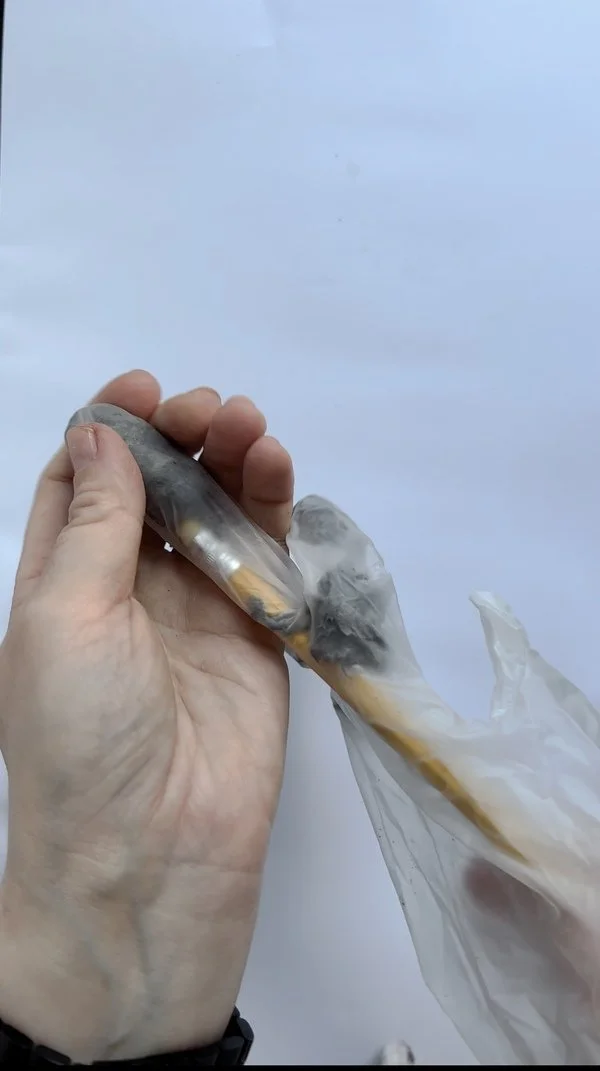
The next step is to cut the glove. Unfortunately, if we leave the paper pulp in the glove, it won't dry properly. Therefore, we need to at least make some cuts in the glove, but it's best to remove it completely from the pulp.

On the paper, we mark the edges of the hand - we need to know where to apply the next layers of paper pulp, which will form the forearm.

In the meantime, the hand should dry slightly. Leave it for a few days (I think two will be okay). If it becomes too hard to connect it with the forearm, use wooden skewers (or something similar) and attach them to the hand. Then the hand and forearm will be securely connected. I've shown this in the next photo.
The next step is to build the forearm. Decide how long you want it to be.


As the paper pulp itself is quite lightweight when dry, and our sculpture is tall, we need to weigh it down. I used stones for this purpose. From a paper towel tube, I made a tunnel, which I later filled with stones. At this stage, I inserted plastic bags into the tube to prevent it from collapsing during the drying process of the paper, which is heavy due to containing unevaporated water.

We place the tube on the bottom layer of the paper pulp and cover it with another layer.

We smooth out the paper pulp, for example, with a knife.

Once completely dry, remove the plastic bags from the tube and fill the tube with stones, sand or something else heavy.

And we seal the bottom with paper pulp.

Once everything is dried, we can sand the entire piece.

Finally, if you wish, you can further embellish the sculpture. I painted some parts of it with paint and then sanded the top surface. This resulted in an interesting effect.

