DIY: Create Stunning Concrete-Look Letters with Paper Pulp
Concrete-Look Paper Letters – A Practical Guide
If you've ever wondered how to create letters that look like they're made of concrete but are as light as paper, you've come to the right place. This technique is not only functional but also aesthetic, and it can become an interesting addition to your DIY projects.
Why Give It a Try?
Concrete-look paper letters are a great way to add a raw, industrial touch to your interiors. They can serve as wall decorations, elements of artistic collages, or personalized posters. You'll impress your guests not only with their appearance but also with their lightness. They look like concrete, but in reality, they are very light – perfect for hanging on the wall without worrying about damage.
Ideas for Use
Personalized Posters – Create posters with inspiring quotes or motivational slogans. These letters will add character and make the poster stand out.
Artistic Collages – Paper pulp letters are great for collages, creating a 3D effect and adding depth to your work.
Wall Decorations – Imagine unique wall inscriptions like “Home,” “Love,” “Create” – anything that suits your style and interior. Remember, the letters can be much larger than those shown in the tutorial.
Gifts – These letters can become a unique, personalized gift for loved ones. Initials, names, or short phrases always make an impression.
Getting Started
The process of creating these letters is simple and satisfying. It all starts with paper pulp, which is prepared according to a basic recipe (you can find more about this in my previous post - link below). Once you have the paper pulp ready, it's time to get creative.
Roll out the prepared paper pulp to achieve an even layer. Use a knife to form an uneven surface. Then, cut out letters using scissors. You can also cut out other shapes like hearts, stars, or any motifs your imagination suggests. After drying, you can paint them to achieve a concrete finish. The paper pulp itself is dark gray because I use newspapers. Therefore, feel free to use dark and light shades of gray and black to give the shapes a three-dimensional look and depth.
What’s Next?
Concrete-look paper pulp letters are a perfect way to introduce an industrial style to your DIY projects. They are versatile and can be used in many different ways – from wall decorations, party decorations, and furniture embellishments to creating informational signs or scrapbooking.
Experiment, play with shapes and colors, and you're sure to create something extraordinary. Add glitter, paint with various techniques to achieve even more interesting effects. The possibilities are almost limitless, and each letter can become a small piece of art that enriches your interiors.
Don’t be afraid to try new things – the magic of DIY lies in experimentation. Every project is a new adventure that not only develops creativity but also brings immense satisfaction from a job well done.
Knife
Rolling Pin
Transparent Film can be Document Sleeve
Printout
Scissors
Ballpoint Pen
Paintbrush
Paint
PVA Glue
Toothpick
Tweezers
Paper Pulp
Link to paper pulp recipe:
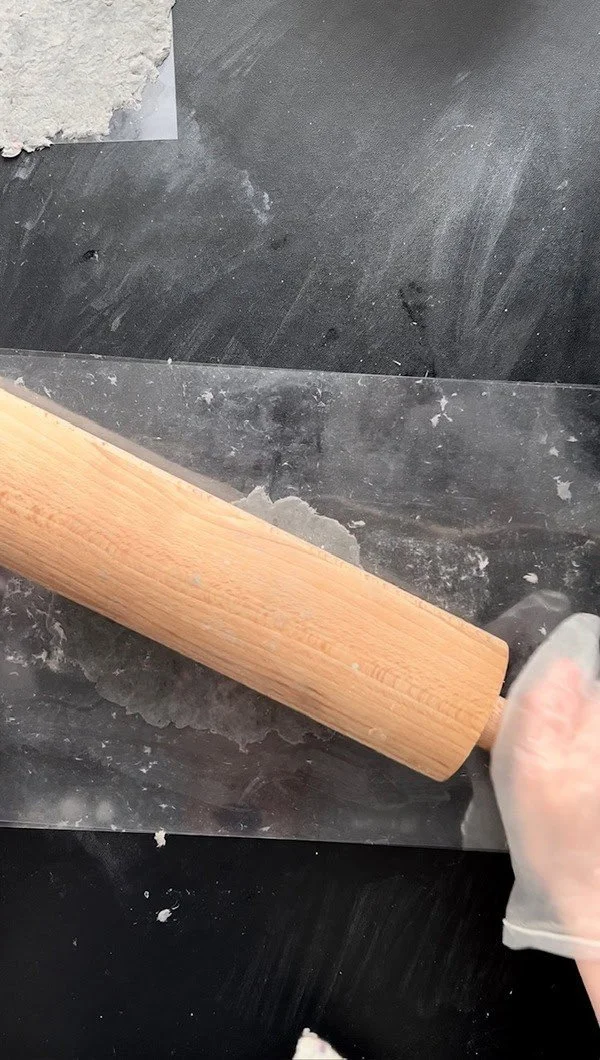
We start the process by rolling out the paper pulp. I rolled it out quite thin, but it really depends on your project. Just remember, you'll need to cut the letters with scissors, so keep that in mind.
Next, using a knife or another tool, create irregularities on the surface of the rolled-out paper pulp.
Leave the entire piece to dry completely.
This is what the top and bottom sides of the pressed sheet look like.
Next, we cut out the letters from our pressed sheet.
We trace them onto the bottom side of the paper sheet. Remember to trace the letters in reverse.
We cut out the letters from the paper sheet.
I painted the edges of my letters with silver paint to make them stand out against the background made from the same material.
In my project, I placed the letters on a doorstop. I used PVA glue for this.
Here is the link to the doorstop tutorial:


