DIY: Creating Raw Paper Forms with Natural Texture and Organic Charm
Raw Paper Forms – Inspiration and Nature in DIY
In my search for something unique that aligns with a natural, minimalist aesthetic, I started experimenting with paper. I wanted to create something that not only looked raw and organic but also captured a texture inspired by nature – something with an imperfect, organic charm. After numerous trials and different approaches, I discovered that everyday newspapers are ideal for achieving the desired texture and depth. This is how my raw paper forms came to life, and now I want to share them with you.
Why Newspapers?
For creating paper pulp, newspapers work best. Their structure, once processed, gives a perfectly matte, raw effect that beautifully mimics natural materials. What’s more, newspapers are easily accessible and ideal for DIY projects that emphasize authenticity in materials. In my method, this type of paper helps achieve a texture full of character, while also being pleasant to work with during the shaping process.
The Key to Perfect Pulp – Smoothness and PVA Glue
To make the paper pulp workable, it needs to have a smooth, uniform consistency. That’s why I add a bit more PVA glue during mixing. This makes the structure more flexible and cohesive, allowing me to freely shape it into any forms I want. PVA glue adds durability to the elements, and the smooth pulp consistency makes it easier to model the forms I envision.
Thickness and Unique Character of the Forms
When creating raw paper forms, you have full freedom over their thickness. It’s up to you to decide what effect you want to achieve – whether it’s thin, delicate pieces or more solid, expressive structures. The thickness depends on the project you’re working on, and the possibilities are endless. You can create three-dimensional compositions that look stunning as home decor or as artistic wall arrangements.
Raw Paper Forms in Color
While I often leave my forms in their natural, raw paper shade, there’s nothing stopping you from painting them in any color you like. This adds a unique character to each project, allowing you to match it with your interior style. Adding color also lets you experiment even more – imagine soft, pastel tones or deep, earthy hues that highlight the natural texture of the form.
Applications – From Bowls to Artistic Compositions
Raw paper forms are more than just art for art’s sake. Their dimensionality and structure make them perfect for various decorative projects. They can become a decorative bowl, an artistic wall piece, or an abstract composition that draws the eye and adds character to any space. Each of these projects brings something unique, simple, yet sophisticated to the space.
What You'll Need:
Paper and pencil – if you want to use a pre-drawn template
Cellophane (the kind used for flower bouquets)
Rolling pin
Knife
Paper pulp (link to the post about making paper pulp below)
FULL TUTORIAL:
Preparing the Work Surface: Guideline Lines and Material Choice
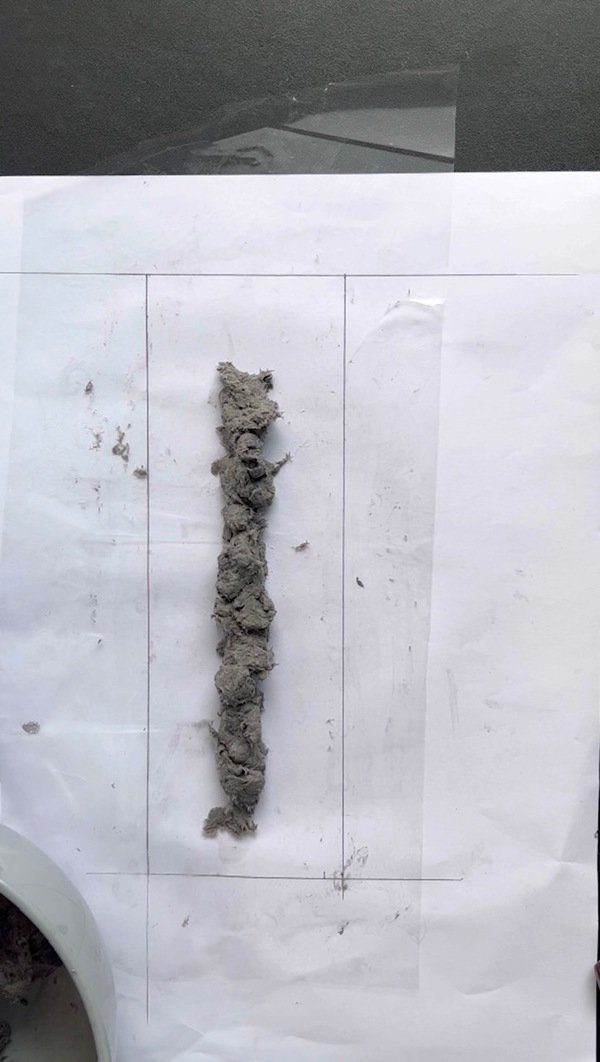
You can start by drawing guideline lines on the paper. If you already have a design in mind and have sketched it out, knowing the dimensions and shapes of your paper forms, this step will help. In this example, I drew a rectangle to shape my elements within the defined area.
Tip: In my projects with paper elements, I often rely on cellophane – the kind used for wrapping bouquets. After numerous trials, I found that it’s the only material that provides a smooth surface for the paper and allows the paper, whether dry or still damp, to easily peel away from the slick cellophane surface. I tried document sleeves and other transfer films, but nothing works as well as cellophane.
In the next step, cover the paper pulp with a piece of cellophane.
In the next step, gently roll over the entire surface, adjusting the pressure based on the thickness you want to achieve.
When you've achieved your desired thickness, gently peel off the top layer of cellophane. Don’t worry if a small piece of the paper pulp comes off with it; we can easily fix this in the next steps.
Shaping and Forming the Paper Pulp
Now we’ll start shaping our paper pulp. Remove any excess pulp, following the guideline lines as a reference.
We smooth and round the edges.
Shaping with Templates
Another method for shaping our elements is to place pre-made paper templates onto the already rolled-out paper pulp.
Drying and Tips
Once you’ve shaped the paper forms, it’s time to let them dry. This process requires patience, as the paper pulp needs time to fully dry and gain durability. Here are a few tips to help you achieve the best results:
Leave the paper forms on cellophane for several hours.
After this time, check if the forms can be removed without damaging them. It’s essential not to wait until they are completely dry.
In the image below, you can see that the drying process has taken too long, as the cellophane itself has wrinkled. However, this is not a step that will ruin our work. In the next step, I’ll show you how to fix it. I often leave my projects to dry, and sometimes something comes up that prevents me from returning to them, which unfortunately causes them to over-dry. The drying process for paper is quite time-consuming.
In the image below, you can see two paper elements. The one on the left is dried correctly, while the second one on the right was "over-dried," showing a shine from the glue.
To fix elements with a glossy surface, spray the shiny area with water and gently rub it with a paper towel or cloth. Just a light rub, then leave it to dry again.


