DIY: Raw Elegance: How to Create a Paper Pulp Bowl

Transforming Ordinary Paper into Art
Paper projects have kind of taken over my life, but in the best possible way. What started as a fun way to recycle old newspapers has turned into a full-blown obsession. Seriously, if you hang around my blog long enough, you’ll see that I’m constantly up to something with paper. I’ve turned crumpled pages into all sorts of things—some of them actually pretty cool! This time, I decided to make a paper bowl. It’s a project I started a while back, but, well, life happened, and I’m only now getting around to finishing it. But hey, better late than never, right? The process has been a mix of experimenting, making mistakes, and eventually getting it right, and now I’m excited to share the whole journey with you.
From Blue to Gray: A Color Evolution
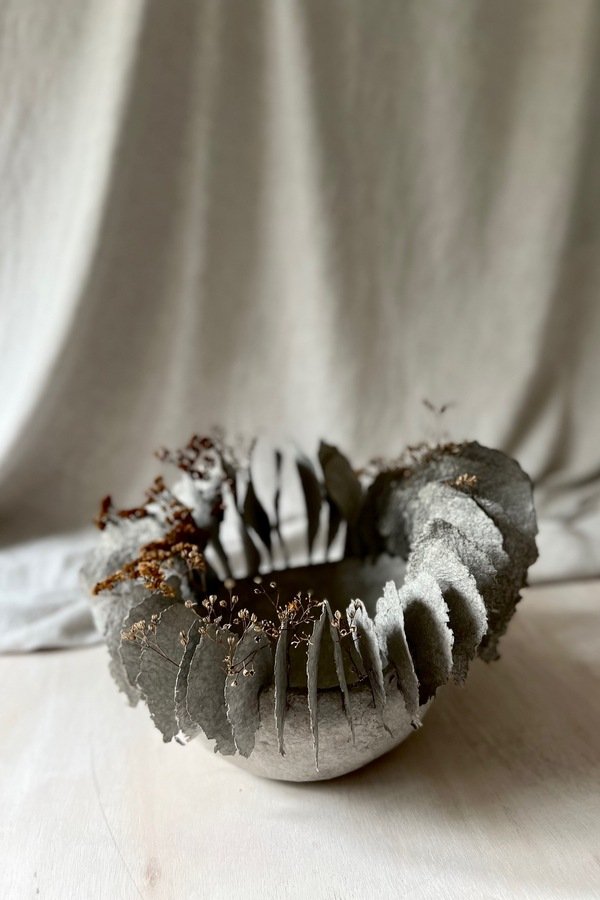
So, about that bowl—it didn’t always have this cool, gray vibe. When I first started, I used regular paper pulp, and the result was a sort of soft, blueish tint. It wasn’t bad, but it wasn’t exactly what I was going for either. Think of it as one of those "happy little accidents" Bob Ross used to talk about. But then, life got busy, and the project sat unfinished for a while (okay, maybe more than a while). When I finally got back to it, I decided it needed a makeover. I went with a gray pulp this time, and honestly, I’m loving the outcome. The gray turned out to be just what the bowl needed—subtle, neutral, and right up my alley. I know, I know, I might have a bit of a thing for gray. But hey, it’s a classic! Maybe one day I’ll dive into a more colorful project, but for now, I’m sticking with these cozy, understated tones.
A Bowl with Endless Possibilities
So, what do you do with a paper bowl once it’s done? Well, that’s where things get interesting. Sure, it could just sit on a shelf looking pretty, but where’s the fun in that? This bowl has potential—like, "I could totally be more than just a bowl" potential. It could become the base for a funky lampshade, or maybe a quirky plant holder. Honestly, the sky’s the limit. Every time I look at it, I think of another way to use it. And that’s what I love about projects like this—one simple idea can spark so many more. So, whether you’re following my steps to the letter or going off on your own creative tangent, this bowl can be whatever you want it to be. Now, let’s dive into the nitty-gritty of how it all came together. Trust me, it’s easier than it looks, and way more fun!
For the first step, you'll need a bowl and some plastic wrap. It doesn’t really matter whether the bowl is glass, metal, or plastic—what’s important is that it serves as a good mold. The key here is to carefully wrap the bowl in plastic wrap, which will make it easy to separate the paper pulp from the mold later on. It’s a simple but essential step to ensure that the rest of the process goes smoothly.

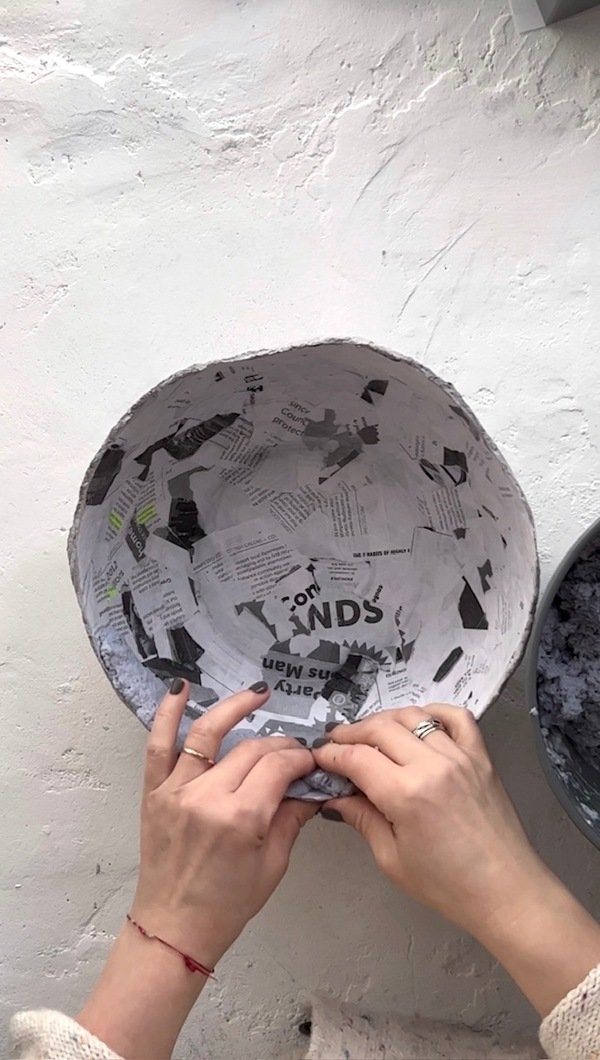
In the next step, I tore sheets of paper (or newspaper) into larger pieces and began applying them to the outer surface of the bowl using a mixture of PVA glue and water. I layered the paper pieces so that each one overlapped the previous one, ensuring they interlocked with each other. I repeated this process until I had applied about three layers of paper, creating a sturdy base for the bowl.


After the layers of paper dried, I started applying the paper pulp. I spread it evenly across the surface and then smoothed the entire layer with a knife to create a uniform finish. This step helped to ensure that the bowl would have a consistent texture and a more polished appearance.


Once the outer layer dried, I applied the pulp to the inside of the bowl. To smooth it out, I used a spoon, which made the entire process much easier. This step helped ensure that the inside of the bowl was as smooth and even as the outside.


The next step was creating the paper forms. After a few trials and errors, I finally achieved a shape that I was satisfied with. This part of the process required some experimentation, but the end result was worth the effort.


Each of the 38 elements was transferred onto the paper pulp. I rolled out the pulp and then shaped each element accordingly. In the end, I decided to leave the edges of each piece unfinished to give them a more raw, natural look. This added an organic feel to the final design.


It's important to number each piece, as this will make assembling the entire bowl much easier and help avoid any confusion during the process. Properly labeling each element ensures that everything fits together smoothly when it comes time to put the final piece together.

If you want to achieve a matte finish on the paper elements, it's important to peel them off the foil (I used cellophane, like the kind used for wrapping bouquets) at the right time. If you leave them on too long, they'll develop a shiny surface. Of course, this can be reversed, but I’ll cover that in a separate article about various challenges when working with paper pulp.


The next step is to cut slits along the edges of the bowl. These slits will serve as slots where the paper elements will be inserted. This will help secure the elements in place and create the final structure of the bowl.

Next, I placed each element in its designated slot and adjusted them to ensure they were aligned properly, just as I envisioned the final look. This step helped to bring the entire structure together and allowed me to fine-tune the overall appearance of the bowl.


I then carefully applied a small amount of PVA glue to each slit and inserted the corresponding element into it. This helped secure each piece in place, ensuring that the elements stayed firmly attached to the bowl.

After the glue had set, I focused on masking the joints. I used a small amount of paper pulp to cover the connections, ensuring a seamless look between the elements and the bowl. This step helped to blend everything together and gave the bowl a more cohesive appearance.
