DIY: How to Create a Charming Paper Pulp Seal Ornament for Christmas
FULL TUTORIAL BELOW:
Why Did I Decide on This Project?
I had never made animals or figurines out of paper pulp before. In my past projects, I’ve felt much more comfortable creating larger forms like vases, bowls, or other decorative items. However, I enjoy stepping out of my comfort zone, and the holiday season seemed like the perfect opportunity to try something new. I decided to create a unique Christmas ornament in the shape of a seal – an imitation of a bauble – for someone special.
Why a seal? The person I wanted to gift this to collects seal-themed items. I thought a personalized ornament like this might bring them joy and fit perfectly into their collection.
Inspiration and Preparations
Before I started, I browsed the internet for inspiration. I wanted to understand the shape and colors of seals to replicate the details as closely as possible. My goal was to create something realistic, but it also had to have a touch of glitter – after all, it’s a Christmas ornament! The glitter was meant to bring a festive vibe and ensure the seal blended seamlessly with other decorations on the tree.
The Creative Process and Challenges
I must admit, the process wasn’t without its challenges. If it weren’t for the festive motivation, I might have stopped after shaping the seal and adding a few patches of color. But I wanted the ornament to look polished and eye-catching, so I pushed myself to refine the details. In the end, I was able to fix minor issues along the way, and I’m happy with the result.
This was my first attempt at creating such a small ornament, so completing it was doubly satisfying. I usually admire how others make such adorable creations, thinking it’s not something I could do myself. But my blog has become a space that encourages me to step out of my comfort zone, try new things, and experiment with different techniques and ideas.
The Final Result
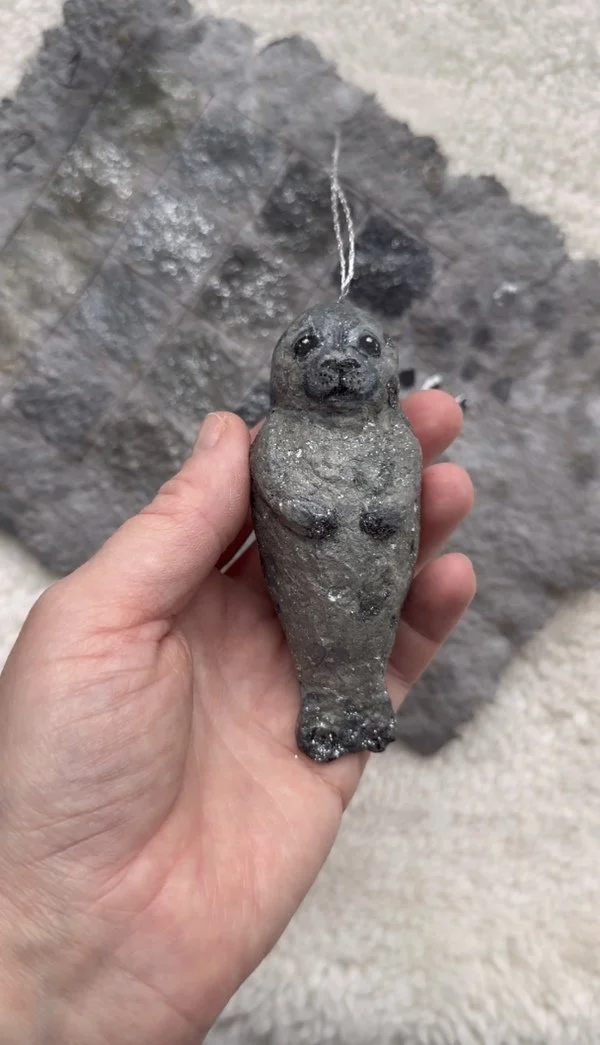
The seal ornament is finished and now proudly hangs on the Christmas tree of the person I gifted it to. Most importantly, the present brought them a smile, which is the best reward I could ask for. Christmas ornaments don’t have to be boring or traditional – even paper pulp can be transformed into something truly unique.
I’m already wondering what else I can create with paper pulp and how I can show you its many creative possibilities. This project proved to me that experimenting is always worth it, and I can’t wait to take on my next, possibly unconventional, idea!
The process begins with drawing your shape flat on a piece of paper. Whether it’s a bear, rabbit, or any other animal, sketch it as if you were viewing it from the front, to scale (1:1). You don’t need to add facial details, like the snout or eyes, just yet, but try to have a general idea in mind of how the animal should look. Next, place a layer of plastic film (this can be a document sleeve or cellophane) over the template and start applying the paper pulp onto it.
What You’ll Need:
Paper pulp (link provided below)
Paper and pencil for sketching the shape
Cellophane or a document sleeve
Knife
Paintbrush
Container of water
PVA glue
Sandpaper (optional)
Paints (I used watercolor paints)
Glitter
Silver paint
Something sharp, like a nail, to make a hole
String (I made mine from silver thread)
Glue (I used a two-component glue)
Fineliner for painting the face
Trim the edges to match the template using a rounded blade knife or a similar tool. Make sure your shape follows the outline of the template precisely.
Once you have achieved a satisfactory front shape, you can smooth the pulp using glue mixed with water and a simple paintbrush.
You can also use a knife to smooth the surface.
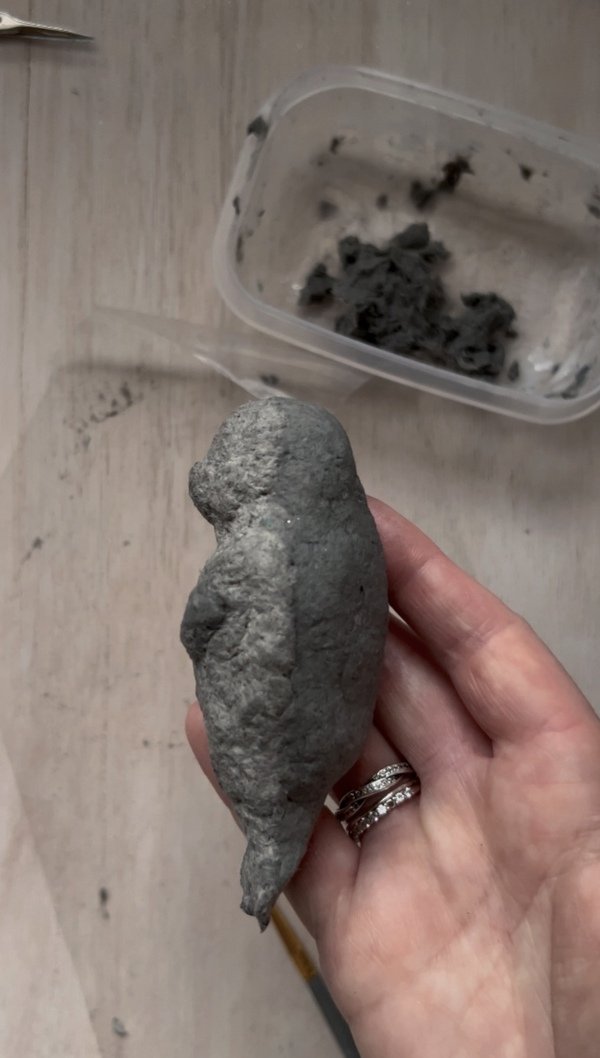
This is how one half of our seal looks from the side.
It's time to add some three-dimensionality to our seal. Add the outlines of the flippers by applying a small amount of paper pulp and smoothing it with a brush.
We leave our half of the seal to dry. It took me about two days.
Once our half has dried, we can start applying paper pulp to the back.
Just like the front, we shape, smooth, and leave the back to dry. Try to align the sides evenly.
Once everything is dry, gently sand the entire figure – of course, only if necessary.
Remember to clean the figure of dust before applying paint.
In the next step, we begin applying paint. I used watercolors because, to be honest, they were gathering dust in my drawer, and secondly, they work wonderfully on paper pulp. In the first step, I painted the entire front of the seal a light gray.
I painted the back in an earthy gray mixed with brown.
At this stage, I also began painting the face. I have to admit, I attempted this several times. Luckily, the paints were highly opaque, so I could easily paint over the face and redraw the details. So, don’t get discouraged! :-)
Using color gradients, we create a sense of three-dimensionality. We darken the flippers.
We add the spots.
In the next step, I decided to create glitter samples. I mixed different shades of silver glitter with PVA glue and applied them to various shades of paper.
After selecting the glitter, I apply it to the surface of the seal using PVA glue.
The final step is making a hole at the top and gluing in the string.


