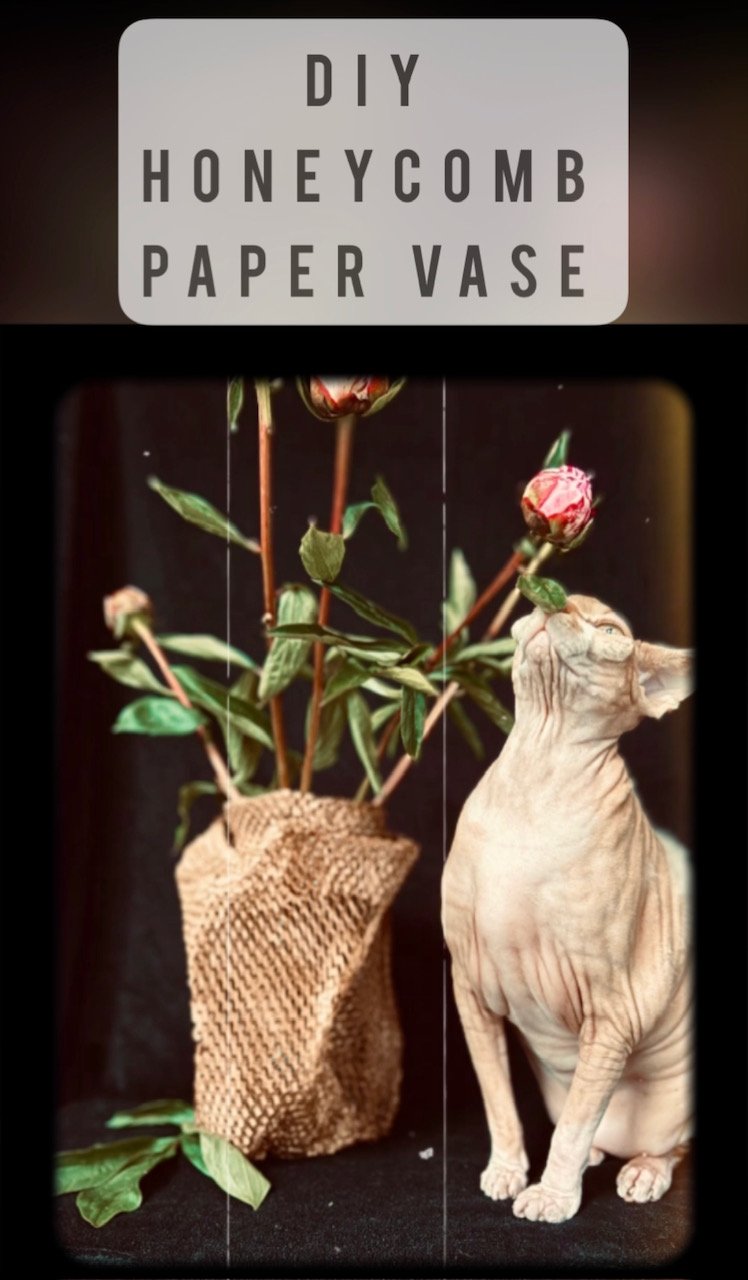
Transformed Treasures: Honeycomb Paper and Plastic Fusion Vase

Everything Started with Paper
Do you like unconventional things? I do too! After a few orders from Amazon, I gathered quite a bit of honeycomb paper and started wondering what to do with it. It turns out that you can create many interesting projects with this paper. In today's post, I'll show you how to make a stylish vase from this unique material. It's not just a way to recycle, but also a great opportunity to add a unique, boho character to your interiors.
Materials Needed for the Project
To create our eco-friendly vase, we'll use honeycomb paper, PVA glue, which works great with various materials, and an old plastic bottle to serve as the base of our vase. With these materials, you'll easily transform ordinary items into a unique decoration. The honeycomb paper will give the vase a distinctive texture and style, the PVA glue will ensure durability, and the plastic bottle will be a solid foundation for your creation.
Eco-Friendly Creation with Character
Designing this vase is more than just a creative endeavor – it's a way to express your ecological awareness. Instead of ending up in the trash, honeycomb paper gains a new life as a beautiful and functional decoration. Your vase will not only be a unique decorative element but also a symbol of sustainable living. Thanks to the characteristic structure of the paper, each vase will have a unique look that stands out in any interior. This is a perfect example of how recycling can create something truly special and aesthetic.
Future Projects with Honeycomb Paper
This is just the beginning of my adventure with honeycomb paper. I already have several ideas for future projects that I'll definitely share with you. The possibilities are truly endless! Honeycomb paper can be used to create unique wall decorations, lanterns, or home accessories. Each project gives you the chance to experiment with shapes and colors, allowing you to express your creativity in many ways.
Unlimited Possibilities
I hope my vase project inspires you to try your own experiments and shows how much can be achieved using recycled materials. Creating with honeycomb paper is a great opportunity to combine ecology with creativity and add a unique character to your interior. Have fun creating something extraordinary!
What you will need:
Honeycomb paper, e.g., from Amazon
Plastic wrap
Sturdy cardboard – I used the backings of picture frames
PVA glue
Scissors
Paper tape
Water dish
Brush
Old plastic bottle
Craft knife
Cardboard
Pins
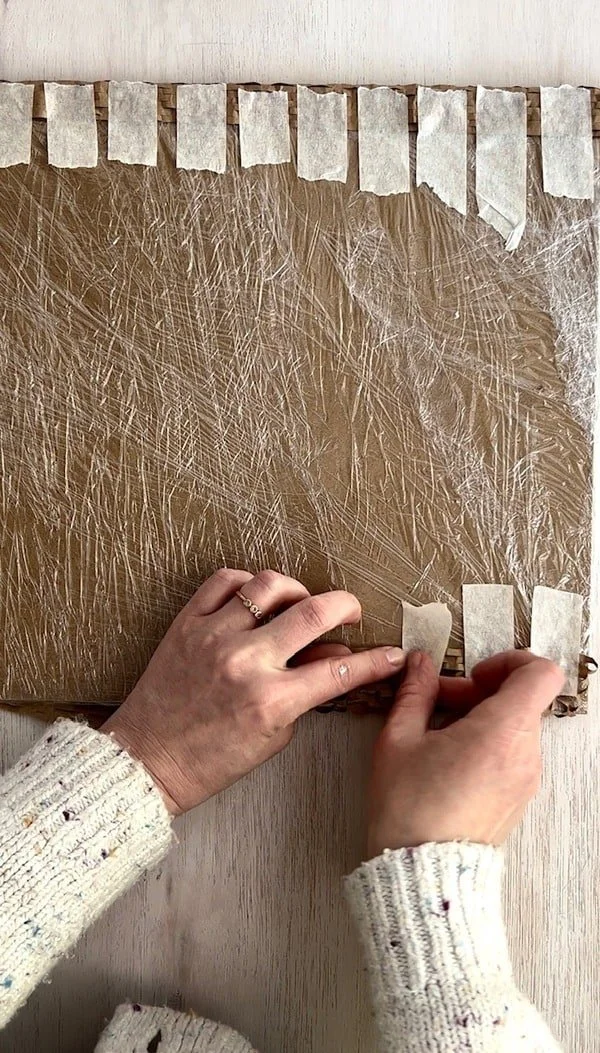
We begin the process by wrapping our sturdy cardboard with plastic wrap. I used two sizes since my vase will consist of two layers of paper. Wrap the cardboard tightly to prevent water and glue from getting inside.


Next, we cut a piece of paper slightly larger than our cardboard.

We stretch the paper over the cardboard and secure the edges with paper tape, covering the wrapped cardboard with plastic wrap. The honeycomb paper should be stretched enough for its surface to create openings.


Next, we mix PVA glue with water in a 1:1 ratio and apply it to the paper using a sponge. We need to thoroughly soak it, but remember to be careful not to tear the paper's texture.


Then we set aside the cardboard with the soaked glue to dry. The next day, everything should be completely dry.
We peel off the tape and gently remove the glue-stiffened paper.

Next, take a plastic bottle and cut off its top.


We wrap the bottle with newspaper and then secure the whole thing with plastic wrap.


We wrap the stiff paper around the bottle, securing the entire assembly with pins.

Then, cover the entire thing with a mixture of water and PVA glue.

Leave the whole thing to dry.
Then, we cut off the excess paper.

Next, we apply a second layer of paper and shape it into our desired form.

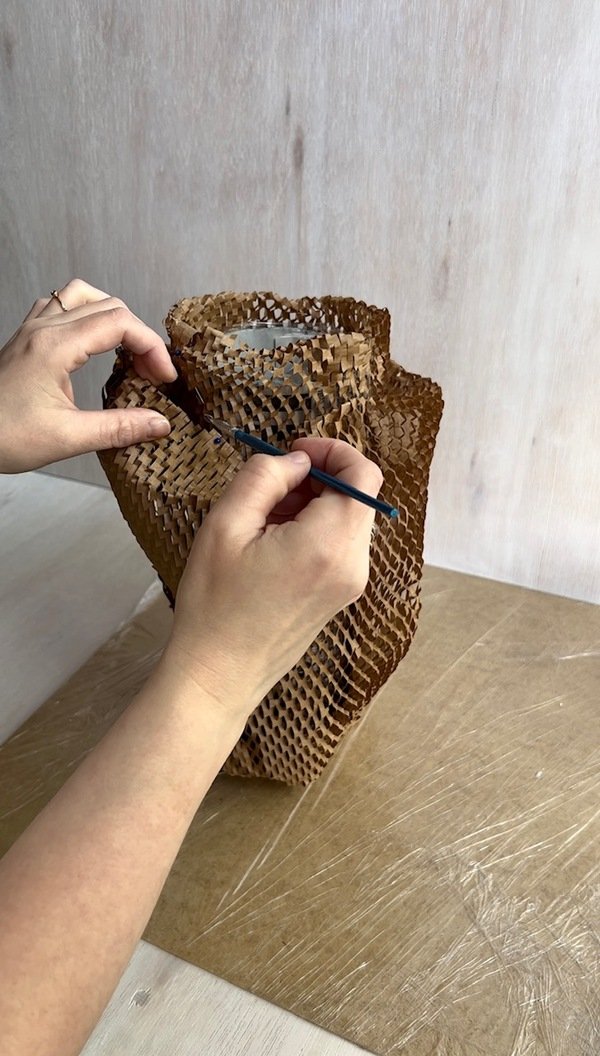
Using pins, we attach the top layer to the bottom layer.

Then, we dip our hands in glue and cover the entire paper surface with our mixture.

The final step is to reinforce the base of the vase. Therefore, I cut out two cardboard circles. I attach one in the center inside the vase, and the other one at the bottom.


