DIY: How to Make a Unique Stone-inspired Vase from Recycled Materials

FULL TUTORIAL BELOW:

A Simple Jar and Newspapers
Today, I have something truly special prepared for you. As part of our DIY series, I'll show you how to transform an ordinary glass jar and old newspapers into an amazing stone-look vase. It's a simple and creative project that allows you to recycle materials and add elegance to any interior.
Recycling and Creativity in One
Recycling is a great way to reduce waste and give old items a second life. In this project, we'll use an old glass jar from Kielecki Mayonnaise and newspapers to create something truly extraordinary. Who would have thought that ordinary newspapers could become the main ingredient of an elegant vase? And if you haven't tried Kielecki Mayonnaise yet, be sure to give it a try – it's a true Polish classic! Creating decorations from recycled materials is not only a way to care for the environment but also a way to save money. Instead of buying expensive ornaments, you can create something equally beautiful yourself using what you already have at home.
Minimalism Meets Eclecticism
This DIY stone-look vase fits perfectly into both minimalist and eclectic interiors. Its simple yet sophisticated design makes it versatile for many different uses. You can place it on the table as a central decorative element, put it on a shelf in the living room, or give it to someone special as a unique gift. Additionally, its universal look makes it suitable for various interior design styles – from modern to classic. This makes the vase a versatile decoration that can easily adapt to changing interior trends. You can also experiment with different shapes and sizes to create a set of complementary decorations that add coherence and elegance to your interiors.
Unique Appearance
Each vase created this way will be unique. The irregularities and texture of the newspaper pulp give it an authentic stone look, making each piece one of a kind. You can also use a tall glass bottle to create a beautiful, tall vase. A set of several different vases will make a beautiful decoration on the table. You can also change the color of the pulp by adding paint, creating a vase in shades of brown, beige, or even white.
Creative Challenge
This project is a great opportunity to showcase your creativity and test your manual skills. The project itself is quite simple, so you can work on it together with children, making it even more engaging and family-friendly. Creating together is a great way to spend time and develop imagination and crafting skills.
Sustainable Creating
Creating a stone-look vase from recycled materials is not only great fun but also a way to promote a sustainable lifestyle. This project shows how easy it is to give new life to old items and create something truly unique. Ready for the challenge? Let's get to work!

Materials and Tools Used in This Project:
A glass jar
Paper pulp (or ingredients to make it: PVA glue, blender, water)
Kitchen tools such as a knife or sculpting tools
Sandpaper
Paint and a brush
Plastic wrap and kitchen towels


You can find the recipe for paper pulp at this link:

The first step is to apply the pulp to the jar.
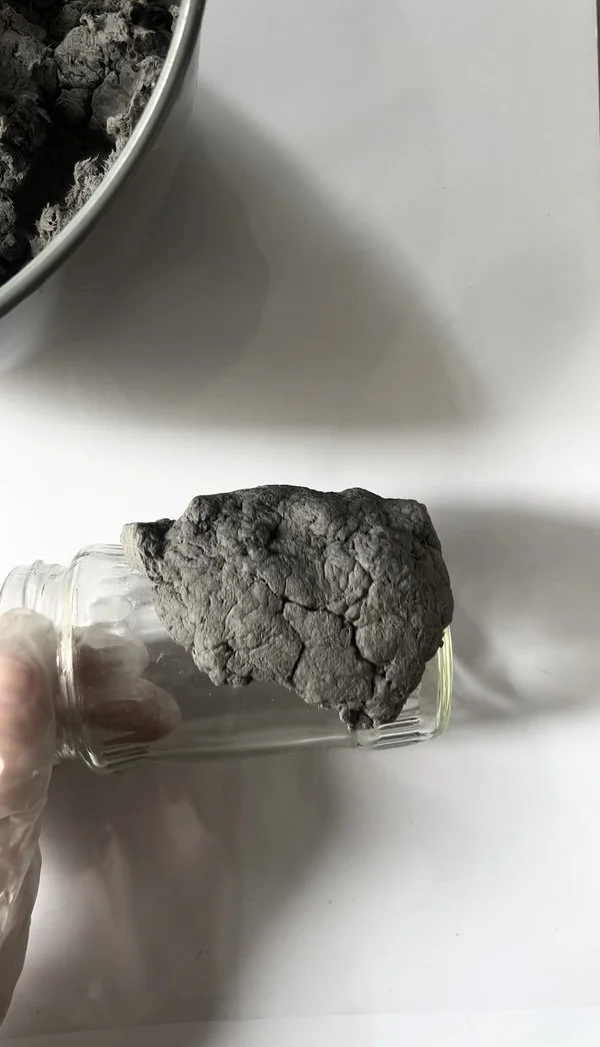
The paper pulp should cover the entire jar. In my case, it even extends beyond the jar. However, in this situation, I know that I won't be able to pour water inside because the water may come into contact with the dried pulp and potentially damage our vase. However, if the pulp is only on the jar and the glass separates the pulp from the water, you can safely pour water inside.

Next, we smooth out the entire surface, for example, using a knife or another tool.

In the next step, we shape the pulp using a tool with a somewhat rounded end. In my case, I used the handle of a knife and the handle of an oil applicator.

After shaping the vase, we need to let it dry for some time until it slightly hardens. However, the pulp should not be completely dry.
The next step is to create decorative holes of various sizes. We can use sewing pins, toothpicks, or other tools with sharp ends for this purpose.


Next, leave the entire piece to dry completely.

Once the entire paper pulp is dry, you can smooth its surface using sandpaper.

The final step is painting. You can add, for example, a dark gray or black color to achieve a more three-dimensional effect.

