DIY: Dreamy Coral-Inspired Cork Board Pin

In today's post, I'll be sharing an enchanting DIY project: a decorative pin for your corkboard. Get ready to dive into an oniric inspired by dreams and coral reefs. This project is not only visually stunning but also surprisingly easy to create. Let's embark on a step-by-step journey and unlock the secrets to crafting this mesmerizing piece.
One of the highlights of this project is the versatile Fimo clay. With its endless possibilities, you can shape and mold it into entirely new forms. The malleability of Fimo allows your imagination to soar as you create intricate and unique designs.
Imagine a world where dreams come alive, where the ethereal beauty of underwater coral reefs meets the gentle whispers of slumber. The color palette and elements used in this project capture that mystical atmosphere, bringing a touch of enchantment to your corkboard.
While the execution may sound complex, fear not! I'll guide you through each step, ensuring a smooth and enjoyable process.
You will need:
Cutting knife
Paper and pencil
Cutting mat
Baking paper
Rolling pin or Mercato-style pasta machine
Foil
Pins
Mini Rotary Tool
Fimo clay
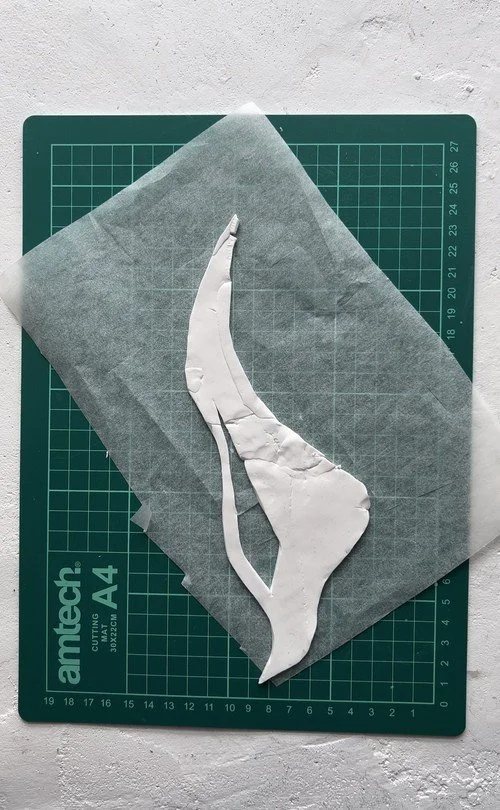
Cut out a paper template in the desired shape that will serve as the base for your pin.
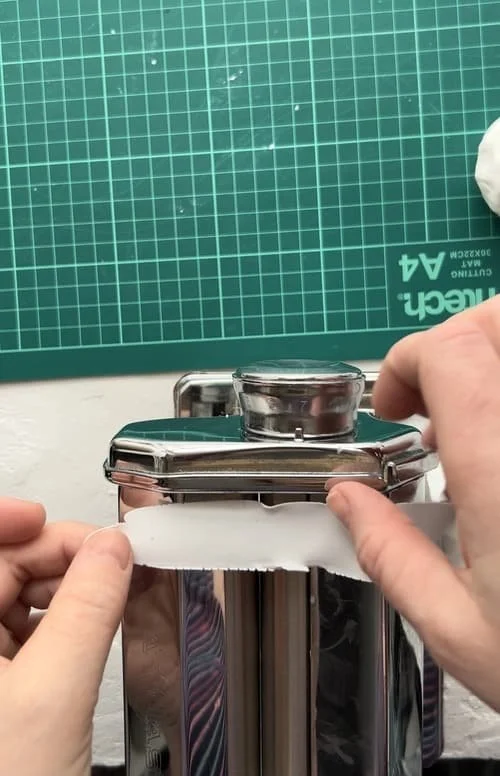
Take Fimo clay and prepare it for use. You can use a regular rolling pin for dough or like I did, a Marcato pasta machine.
Flatten a piece of Fimo clay using the rolling pin or pasta machine. Make sure it's large enough to accommodate the paper template.


Place the paper template on top of the flattened clay and carefully cut around it with a craft knife or a sharp pair of scissors. This will create the base shape for your pin.
Remove the excess clay from around the paper template.


Next, take some more Fimo clay and slice it into rectangular, thin strips.
Using a rolling pin or pasta machine, roll out the strips of clay into very thin strips, as thin as possible.

Next, cut out long, irregular strips.
Arrange the long, irregular strips onto the base of the pin, overlapping and intertwining them to create an artistic and textured design.


Carefully transfer the clay shape onto a baking sheet or a heat-resistant surface.
Follow the instructions provided with the Fimo clay to bake it in a preheated oven. Typically, the baking temperature ranges from 110°C to 130°C, and the baking time is around 30 minutes.


Then mark the spots where the pins are to be placed.
Using a mini rotary tool, drill holes of a size that allows the pin heads to fit.


Then, insert a piece of Fimo into the bottom of the hole and attach a metal pin, filling the surrounding area with Fimo. The pins must be metal as only they can be baked in the oven.


Bake the pin again in the oven.