DIY: Concrete-Looking Trousers Hanger
Rough Concrete Imitation
Are you dreaming of an original trouser hanger that evokes raw concrete, but haven't found one in stores yet? Well then, I have a brilliant solution for you! Thanks to the combination of paper mache and metal skewers, you can create a stylish and personalized accessory that can serve as both a gift and a decoration in stores or showrooms. Let's get started!
Customization at Your Fingertips
One of the greatest advantages of this project is the ability to customize it according to your preferences. You can emboss any desired text on the hanger, making it unique and personalized. With this concrete imitation, you can also go wild - add darker colors, more cracks.
Not Just for Home
The concrete-style trouser hanger is not limited to home use only. It can also be a perfect addition to retail stores or showrooms, adding a unique charm and style to the space. Additionally, such a decoration can catch the attention of customers and stand out among other products, which in turn can translate into increased sales and customer satisfaction. Just imagine how great it will look in store arrangements in packshots or product advertising photos, adding professionalism and modernity to the whole presentation.
Embrace Originality
Creating a unique trouser hanger in a concrete style not only brings joy but also gives you the opportunity to express your creativity. With a simple guide, you can create not only a practical addition to your wardrobe but also a unique decorative element that catches the eye and surprises with its originality. Let your creativity flow and create something special today!
Gather the following materials:
Paper mache
Metal skewers
Paintbrush
Water
Printed paper with desired text (optional)
Letter embossing tool (optional)
Plastic wrap
Cloth
Sandpaper
Paint
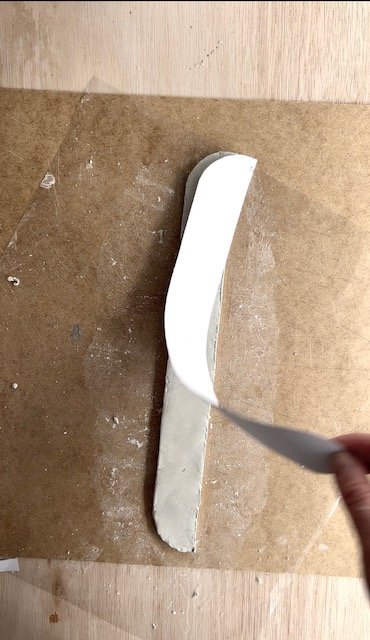
Rolling out the paper mache to the desired thickness Start by rolling out the paper mache mixture to achieve the desired thickness for the hanger. In this case, you have decided on a total thickness of 2 cm, with the bottom layer being 1 cm thick.
Next, we need to take the metal skewers and cut them to the appropriate lengths. We will need one long skewer, two short skewers, and one skewer in the shape of a hook.
Next, we need to place the metal elements in their respective positions.
On the second layer, we apply paper with reversed text and transfer the text onto the paper mache using water.
Take the paper with the desired text printed on it. Make sure the text is reversed, as it will be transferred onto the paper mache in mirror image.
Place the paper with the text facing down onto the wet surface of the second layer of paper mache. Ensure that it is positioned correctly, as the text will be transferred as is onto the hanger.
Gently press the paper onto the wet paper mache, making sure there are no air bubbles or wrinkles.
Moisten the paper with water using a paintbrush or a damp cloth. Be careful not to soak it excessively, but ensure that the paper is adequately dampened.
With gentle strokes, start rubbing the dampened paper using your fingers or a cloth. The water will help transfer the ink from the paper onto the surface of the paper mache, creating the reversed text.
Next, we apply the top layer onto the bottom layer and use your fingers or a brush to smooth out any bumps or creases.
Next, use a thin tool to carve out the letters. Carefully carve out the letters from the surface of the paper mache. Follow the printed text as a guide for carving the desired shapes.
Leave the entire piece to dry, which may take several days.
Find a well-ventilated area where you can place the paper mache hanger without it being disturbed.
Allow the hanger to air dry naturally. Avoid exposing it to direct sunlight or high heat sources as this can cause the paper mache to warp or crack.
During the drying process, periodically check the hanger for any signs of moisture. If you notice any damp areas, allow them more time to dry before proceeding.
The drying time can vary depending on factors such as humidity levels and the thickness of the paper mache layers. Be patient and allow ample time for the hanger to thoroughly dry.
Once the paper mache has dried, you can begin the painting process. For the concrete look, you have chosen to use light-colored paint. Prior to painting, I also used sandpaper to create an uneven texture with natural-looking cracks.
Start by preparing your chosen paint color, ensuring it is a light shade that resembles concrete. Acrylic paints or specialty concrete effect paints can work well for this purpose.
Using a paintbrush or sponge, apply the paint evenly to the entire surface of the paper mache hanger. Apply multiple coats if needed, allowing each layer to dry before applying the next.
I painted carving letters with silver paint to create a nice shimmering effect.


