DIY: Concrete-Look Planter Cover Tutorial

Creating Plant Covers: My Discovery of Joyful Creative Relaxation
Crafting my own things is not just a passion for me, but also a way to find peace and unwind. When I reach for various materials and start creating, I forget about everything else and simply enjoy the moment. But recently, I decided to step out of my comfort zone and try something entirely new – crafting plant covers from paper pulp.
It was actually a practical matter that led me to this project. I have a lot of plants at home, and standard pots just didn't fit my decor. So, I decided to combine pleasure with utility and make something that would not only bring me joy but also decorate my home garden in a unique way.
Inspiration from Concrete: My Own Plant Cover Project
I have a weakness for the industrial charm of concrete elements in interiors. The raw yet elegant character of concrete adds a unique atmosphere to any room. Moreover, my apartment largely reflects this love for concrete details, filled with simplicity and raw elegance.
However, when it came to finding stylish covers for my plant pots, it proved to be a challenge. Good concrete covers are hard to come by, and those I managed to find didn't necessarily fit my interior. It was this frustration and the desire to create something that would perfectly fit my industrial style that inspired me to create my own covers for my green companions.
Adventure with Paper Pulp: My Favorite Medium
During my search for the perfect material for covers, I came across the idea of using paper pulp. It was something entirely new to me, but I immediately knew it was the right choice. I love using various old things or accumulated newspapers, and paper pulp seems to be the perfect medium for my projects. It's eco-friendly, inexpensive, and offers endless possibilities for creation.
Creating the Cover: My First Steps in the Project
I started with simple ingredients: a few old newspapers, some glue, and water. That was enough to embark on the fascinating journey of creating a cover from paper pulp. Molding the material according to my own idea was pure joy. I could give it any shape and size, perfectly fitting my style and my plants.
However, although the process seemed fascinating, it turned out to be somewhat time-consuming and required patience. The elements had to dry before moving on to the next stages, which took some time. Along the way, there were some challenges, but none of them were too serious to solve. By the way, you can see it in the video and photos :-)
Final Outcome: Uniqueness in Simplicity
When my cover finally dried, I proceeded to the final stage: painting. Using a special painting technique gave it a distinctive concrete look that I was delighted with. But the best part is that the cover is not as heavy or fragile as real concrete, making it easier to transport and handle. The natural gray shade of the paper pulp adds a minimalist charm that perfectly complements any interior.
Summary: Creating Plant Covers from Paper Pulp: My Experiences
Creating plant covers from paper pulp provided me with incredible creative experiences and an inspiring challenge. This project demonstrated that ordinary materials can become extraordinary decorations. It’s more than home decor; it’s an eco-friendly, conscious approach to design. I encourage everyone to try making plant covers from paper pulp to add unique, personalized accents to their homes. Let your creative journey begin now!

Below, you can see other plants pot covers that I made, as well as the result of the paper pulp concrete effect.


To make a plant pot cover you will need:
1. Old paper, newspapers
Shredded paper or paper torn into pieces
2. Scissors
3. PVA glue
4. Stapler
5. Brushes
6. Plastic box/ bowl
7. Water
8. Plastic foil/ board/ cardboard
9. Blender
10. Bowls
11. cheesecloth or other cloth
12. Fork
13. Knife- butter knife
14. Marker
15. Sharp knife
16. Sandpaper
17. Gloves
18. Paint ( white eggshell or mat)
19. Paints colors: black, beige, brown
20. Jar lids
21. Washing up spange
22. BBQ Skewers
23. Pliers
24. Mini rotary tool

Below, I present a small sketch on how to design the cover.

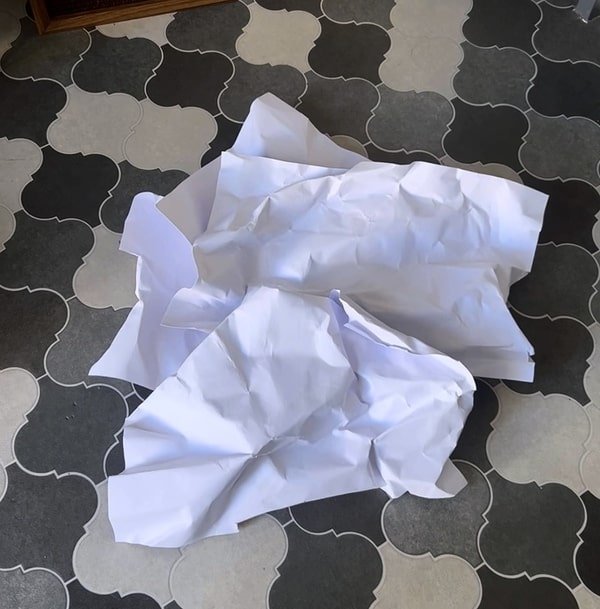
To make this cover, begin by selecting sturdy, thick-textured paper. Crumple the paper to create an uneven surface that adds texture and character. Wrap the crumpled paper around the pot. To secure the cover, use a stapler to join multiple folded sheets of paper together, ensuring they are firmly attached.


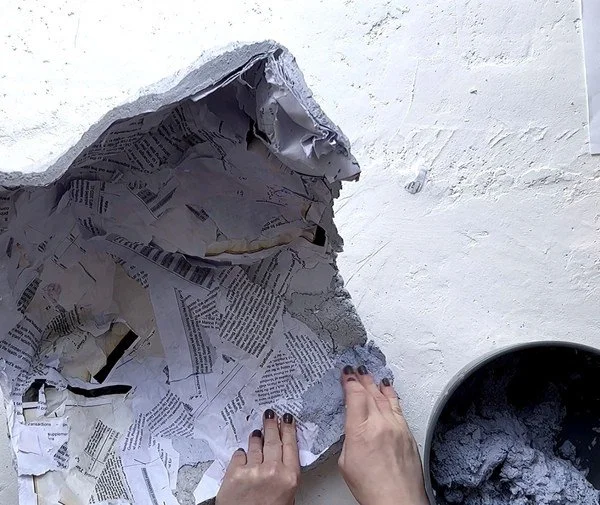
Next, gather paper materials such as old sheets or newspapers and cut them into larger pieces. Prepare a mixture of water and PVA glue in equal parts (1:1 ratio). Apply the paper pieces, ensuring they overlap each other. I recommend applying around 6-7 layers for sturdiness. Allow the construction to dry, which typically takes several days.


Once our construction is dry, we proceed to apply the paper pulp to it. Below, you will find a link on how to make paper pulp.

Once our construction is dry, we proceed to apply the paper pulp to it.
Avoid applying the paper pulp to the entire surface at once, as the construction may collapse under the weight of the moist mixture. Instead, apply the pulp in a few areas and allow it to dry before applying it to the remaining portions.
This stepwise approach will ensure the stability of the structure during the drying process. Once the applied pulp has dried in one section, you can proceed to apply it to the remaining areas.


Next, on two opposite sides of the cover, mark the areas where cuts or slits will be made.


After making the cuts, you can remove the inner paper and begin applying the pulp inside. Alternatively, you can skip covering the inner part with pulp and paint it directly instead.


After making the cuts, you can remove the inner paper and begin applying the pulp inside. Alternatively, you can skip covering the inner part with pulp and paint it directly instead. I mixed white paint with black, brown, and gray colors.


The final step is to attach the closure. In my case, I used metal barbecue skewers for this purpose. However, feel free to explore other closure options as well. If you come up with any alternative ideas, please let me know!


What if, after drying, it turns out that the cover is too small? Don't worry and don't discard it! Simply measure the amount of additional space needed on each side, and use a drill and wire to expand the entire structure.


