Paper Pulp Coasters – Raw Texture and Endless Possibilities

FULL TUTORIAL BELOW:

Some time ago, I shared an experiment on my blog where I played around with different textures in paper pulp. If you haven’t seen that post yet, you can check it out here to see how it all started. Today, I want to show you the next step in this project – handmade coasters with a raw, organic structure that can serve as a great base for further creative exploration.

How Were They Made?
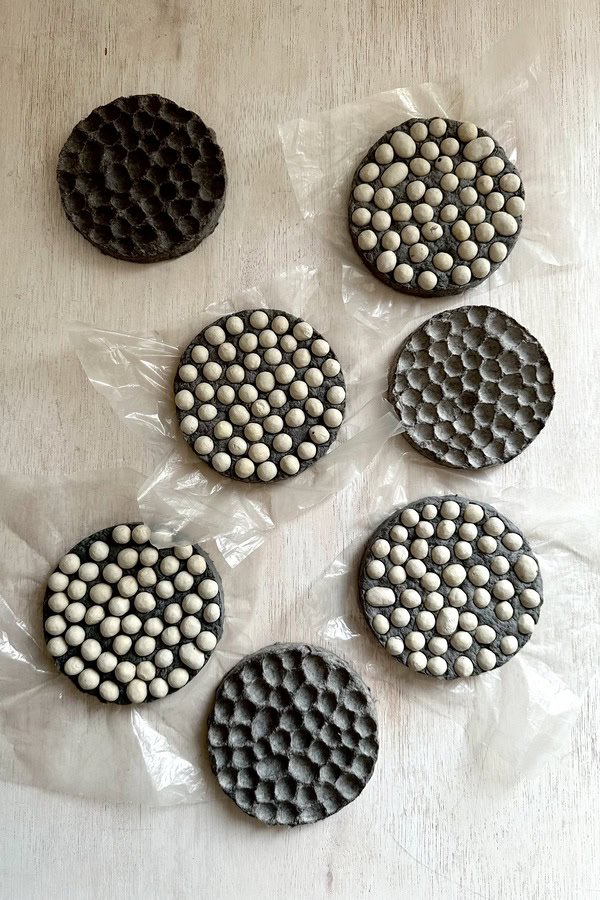
I created these coasters using my usual paper pulp technique, but this time, I used a metal baking ring to ensure a perfectly round shape. The textured surface was achieved by pressing baking beans into the pulp, resulting in a pattern reminiscent of natural stone. Once dry, the material became hard and slightly rough to the touch, further enhancing the raw and earthy character of the design.
Ways to Decorate Them
These coasters look great in their natural form, but there are plenty of ways to customize them:
Painting – Acrylic paints, stains, metallic effects, or vintage-style distressing can transform the look completely. You can even create a patina effect to make them resemble aged stone or concrete.
Gold Leaf and Highlights – Adding subtle gold or metallic accents to the raised surfaces can give them a more refined, elegant appearance.
Matte or Glossy Finish – Depending on the final look you’re aiming for, a matte finish will emphasize the raw aesthetic, while a glossy coat can create a more polished, modern effect.
Eco-Friendly and Unique
As always, these coasters were made using old newspapers, making this project a perfect example of upcycling. Instead of discarding paper waste, it can be turned into something both functional and aesthetically pleasing. Creating handmade items in a zero-waste spirit helps reduce unnecessary waste and gives new life to materials that would otherwise end up in the trash.
Moreover, paper pulp is an environmentally friendly crafting material that requires no special tools or harmful chemicals. It can be colored with natural pigments, and when the item is no longer needed, it can easily be recycled or left to biodegrade. This makes it a sustainable alternative to many other materials commonly used in crafting.
Beyond Coasters
This paper pulp technique can be used to create much larger projects. Similar methods can be applied to make trays, bowls, decorative wall panels, or even elements of larger sculptures. The textured effect seen on these coasters could work beautifully in bigger functional art pieces as well.
Materials Needed for Making Paper Pulp Coasters
To create coasters with a raw, stone-like texture, you will need a few basic tools and materials:
Foil / cellophane – to line the mold, making it easier to remove the coaster once it dries.
Metal baking ring or another mold – this can be a round ring, a square mold, or anything that will help shape your coaster as desired.
Paper pulp – see the recipe below.
Baking beans – to create the stone-like texture.
Sandpaper (optional) – for smoothing the edges or surface after drying.
Scissors and a marker – useful for marking and trimming the foil if needed.
Paints, varnish, etc. (optional) – if you plan to decorate the coasters further.

Step 1: Preparing the Mold and Securing the Foil
The first step is to line the metal mold with cellophane foil. The foil will make it easier to remove the dried paper pulp coaster later. A line has been drawn on the foil at a height of 1 cm, as this is the desired thickness for the coasters. This helps control the amount of pulp applied and ensures even edges.


Step 2: Applying the Paper Pulp
In the second step, I apply the paper pulp into the mold, following the previously drawn line on the cellophane foil. I carefully spread it evenly and press it against the edges to ensure the coaster has a uniform shape. In the background, you can see the tools I use to smooth the pulp.

Step 3: Creating Texture with Baking Beans
In the next step, I press baking beans into the surface of the paper pulp. This will create a distinctive texture resembling natural stone. I distribute the beans evenly to ensure a consistent and aesthetic pattern.

Step 4: Drying and Finishing the Coaster
After shaping the texture, I leave the coaster for a few hours to allow the paper pulp to partially dry. Then, I carefully remove the baking beans, revealing the textured surface.
I let the coaster continue drying. Once it is about 80% dry, it can be gently weighted down with books or another flat, heavy object. To speed up the process and prevent warping, it's best to place the coaster on newspaper or paper and cover it with another layer of paper—this will help absorb the remaining moisture.
Once fully dry, the coaster becomes hard and ready for further refinements. If the edges feel rough, they can be lightly sanded with sandpaper for a smoother finish.
The final step is decoration. The coasters can be left in their raw form or customized in any way. I decided to enhance the texture by painting some of the indentations in a dark gray shade, adding depth and dimension to the surface.