DIY Tutorial: How to Make a Stylish Vase Cover from Recycled Materials

FULL TUTORIAL ON YOUTUBE:

My Passion for Paper Crafts: Creating Unique Projects
For quite some time now, I have been passionate about paper crafts. I love working with paper pulp and coming up with completely new ideas. Recently, I had the idea to press and roll paper pulp into thin sheets. Once dried, they take on fantastical shapes that captivate with their uniqueness. This is just the beginning – in future projects, I will definitely use this idea in various ways.
Creating a Stylish Vase Cover from Recycled Materials
In today’s world, where we are increasingly conscious of the environment, finding creative ways to repurpose everyday items is not only practical but also fulfilling. In this article, I’ll show you how to transform a simple jar and cardboard into an elegant vase cover with a three-dimensional, minimalist design, using recycled materials.
This project relies on using paper pulp made from old newspapers and glue, making it environmentally friendly and budget-conscious. By repurposing materials that would otherwise end up in landfills, we reduce waste and add a unique touch to our interiors.
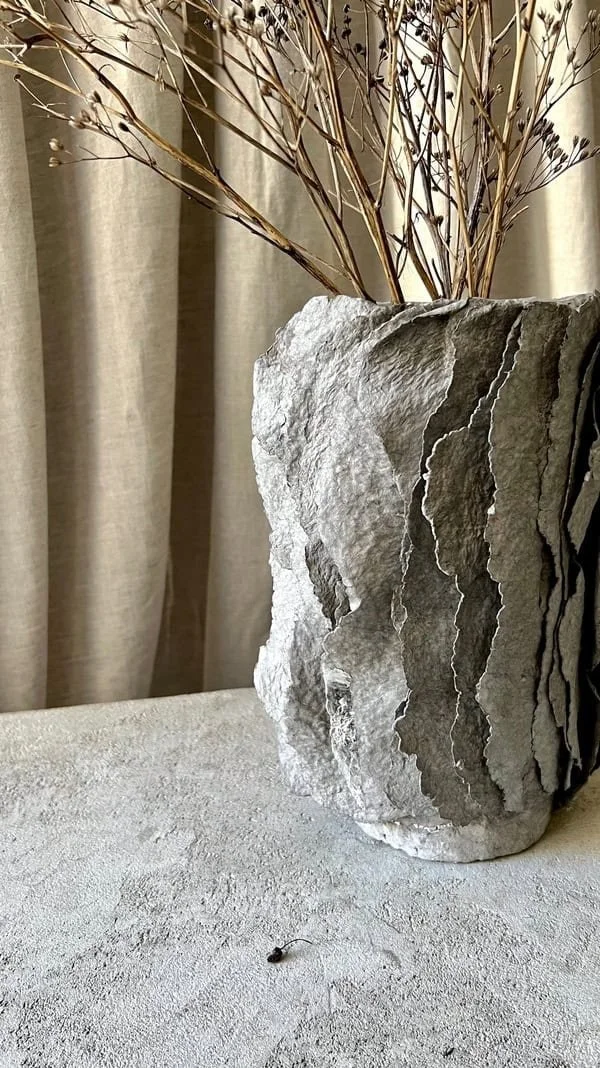
To begin, gather your materials: old newspapers, glue, and cardboard. The process involves shaping the paper pulp into thin layers and allowing them to dry, resulting in a sturdy, concrete-like texture.The naturally gray hue of the final product is achieved through the blending of newspaper fibers, adding to its minimalist charm.
Minimalist Design with a Three-Dimensional Touch
The beauty of this project lies in its simplicity. The three-dimensional aspect adds depth and visual interest to the vase cover, making it a versatile addition to any room. Whether displayed on a shelf, used as a table centerpiece, or given as a thoughtful gift, this handmade piece is sure to impress.
Creative Fun with Paper Pulp
If you’re looking for a creative way to spend your time, this project is for you! Creating with paper pulp is not only eco-friendly but also incredibly satisfying. Grab some old newspapers, glue, and start experimenting. Remember, the most important thing is to have fun and be creative. Let’s get crafting!

You will need:
Cardboard
Knife
Glue
Piece of old newspaper/paper
Jar
Plastic bags or something to stuff the paper tube
Pencil, ruler
Transparent foil/cellophane
Roller
Scissors
Sandpaper
Take an old piece of cardboard and cut out a rectangle from it. Mine measures about 24 cm. Wrap your jar so that it has excess cardboard. This will be our base for the vase cover. Then, make cuts along the height of the cardboard - but do not cut it completely. This will make it easier for you to fold the cardboard into a tube. Glue the edges together with paper.


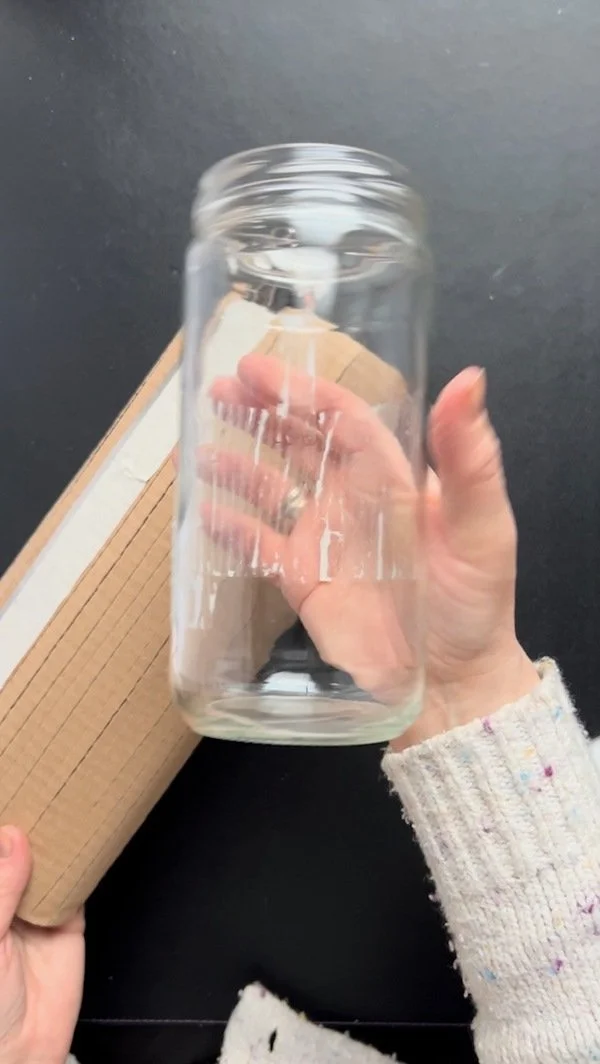
To reinforce the entire structure, I inserted plastic bags inside the tube, which will support the weight of the paper mache - it won't collapse under the wet mass.


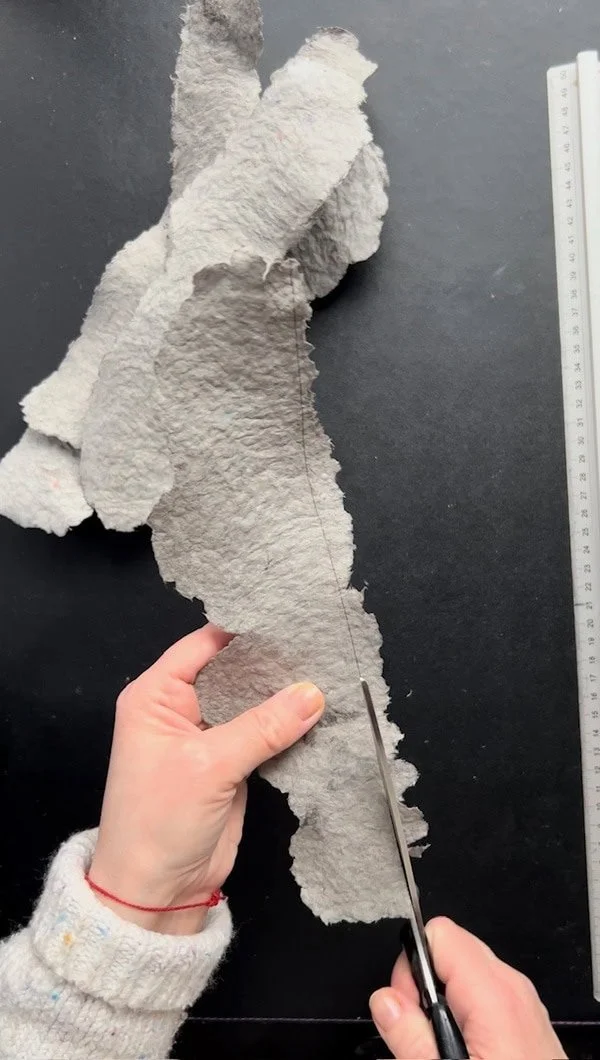
Next, we move on to creating decorative elements. For this, I used a sheet of paper on which I drew lines at 20 cm intervals - leaving 4 cm for the edges of the vase. I placed a piece of cellophane on the sheet, and on top of it, I applied the paper pulp, which I also covered with cellophane.

Then, using a rolling pin (in my case, a pastry roller), I roll out the paper pulp into a very thin layer.


Next, I shape the decorative elements using a knife.


We leave the elements to dry. They need about 12-24 hours - it all depends on their thickness and the drying location. If you place them near a radiator, the elements will be more warped.

The next step is to trim one of the sides. If they're even, it will be easier for us to place it on our structure.

Then we move on to applying our elements onto the paper tube. I suggest gluing a few at a time and then waiting until the whole thing is relatively dry. Don't apply everything at once because the structure won't hold it. The paper pulp itself is quite strong, and water needs to evaporate.


If you feel like it, you can remove the inner texture and apply a thin layer of paper pulp. Or, you can paint the texture.


The final step is to sand down any unevenness.

I decorated mine with silver accents.
